7 Awesome Ways to Use GPT Image (gpt-image-1) in AI-FLOW
Thinking about how to get the most out of GPT Image (gpt-image-1)?
GPT Image is super versatile and perfect for loads of cool creative projects. Combined with AI-FLOW, it turns your creative ideas into reality with just a few clicks, no coding needed.
Here are 7 incredible ways to start using GPT Image today!
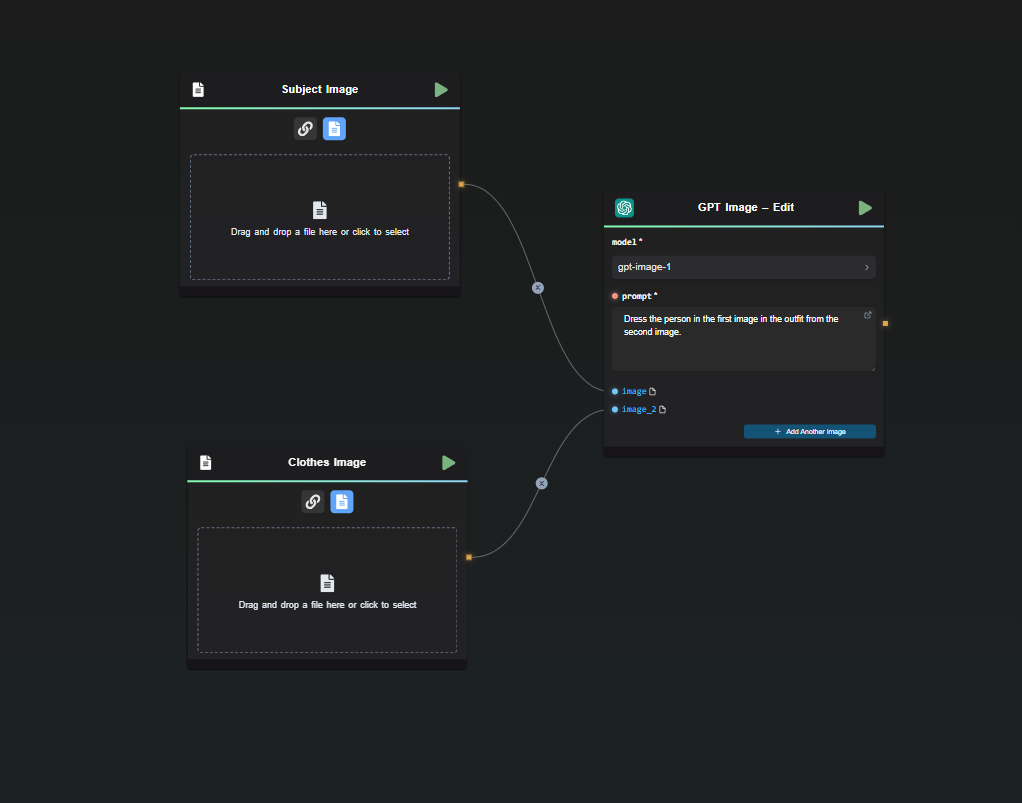
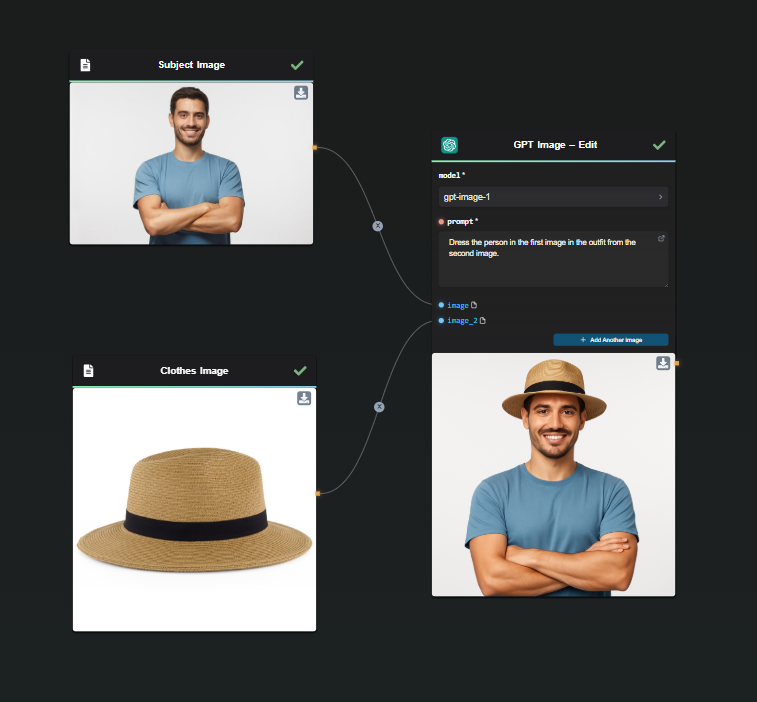
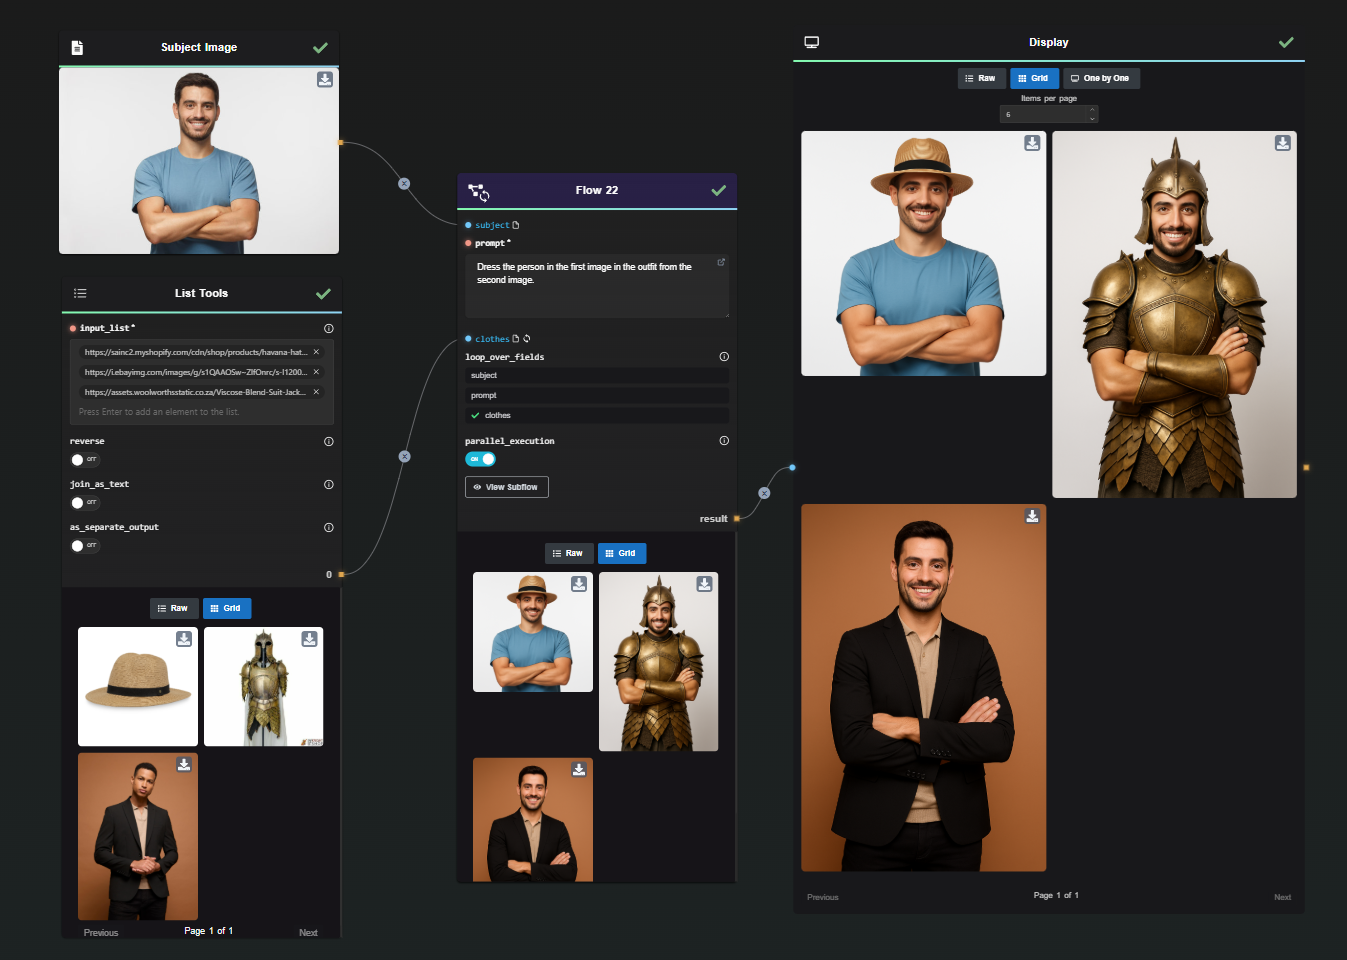
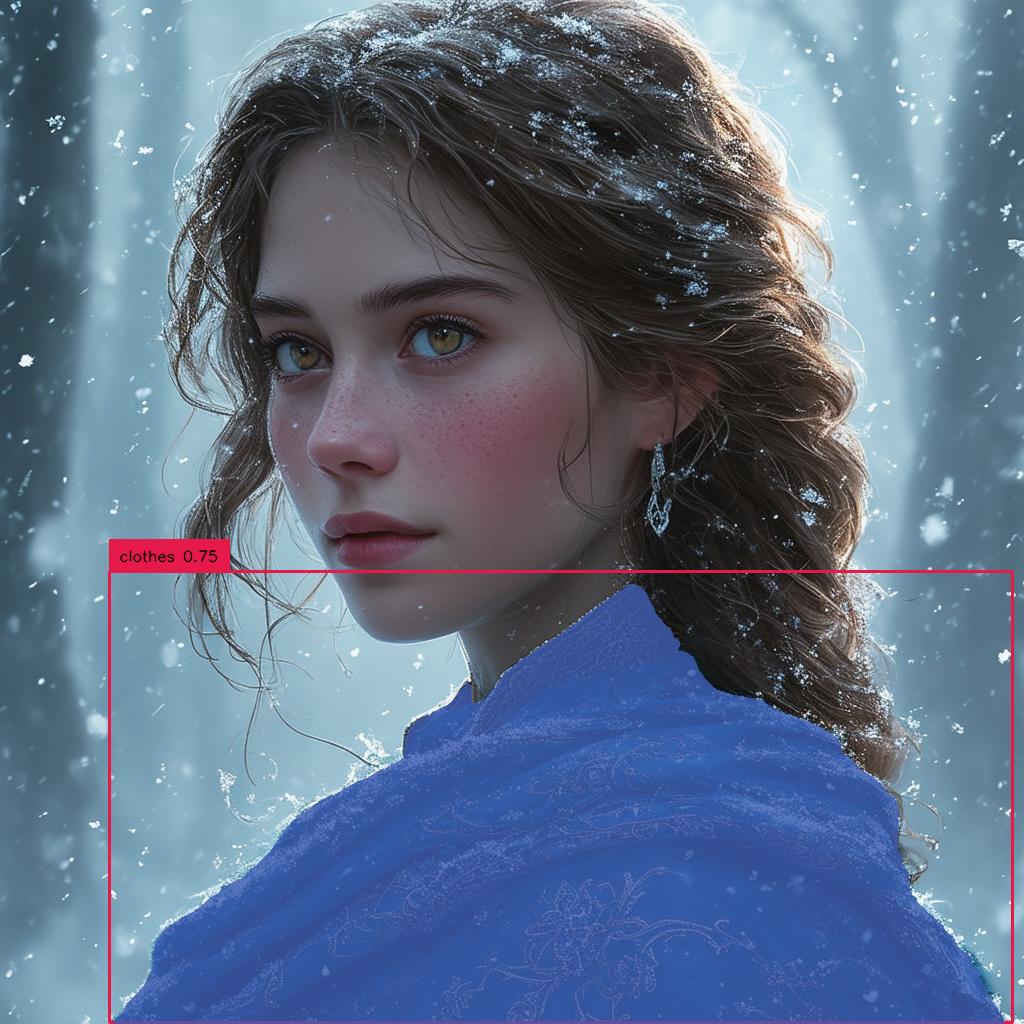
1. 🎽 Instant Fashion Visualization
Ever imagined seeing your clothing designs instantly appear on real models? GPT Image lets you do exactly that. Perfect for fashion brands, designers, and online retailers looking to showcase new collections without costly photoshoots.
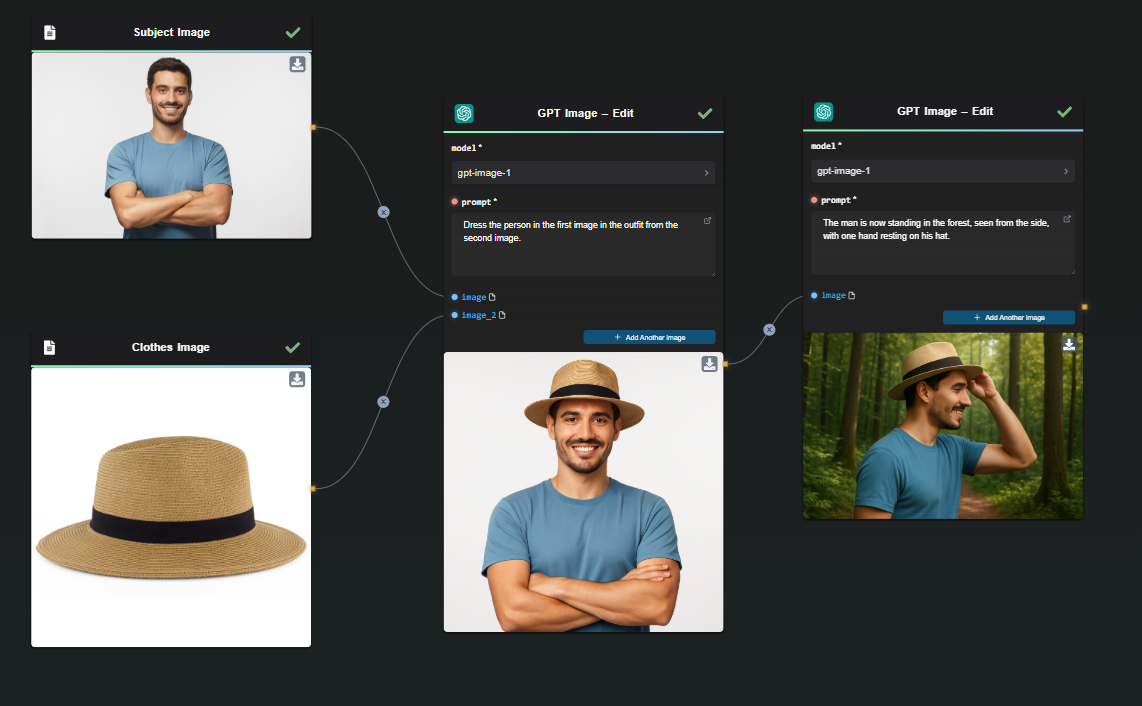
👉 Check out our step-by-step guide to fashion visualization!
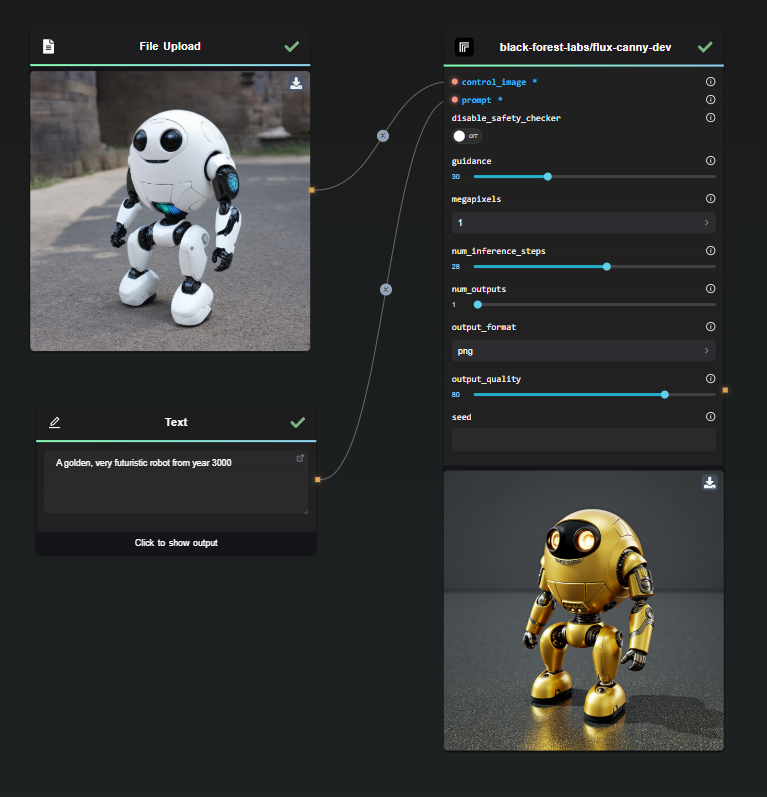
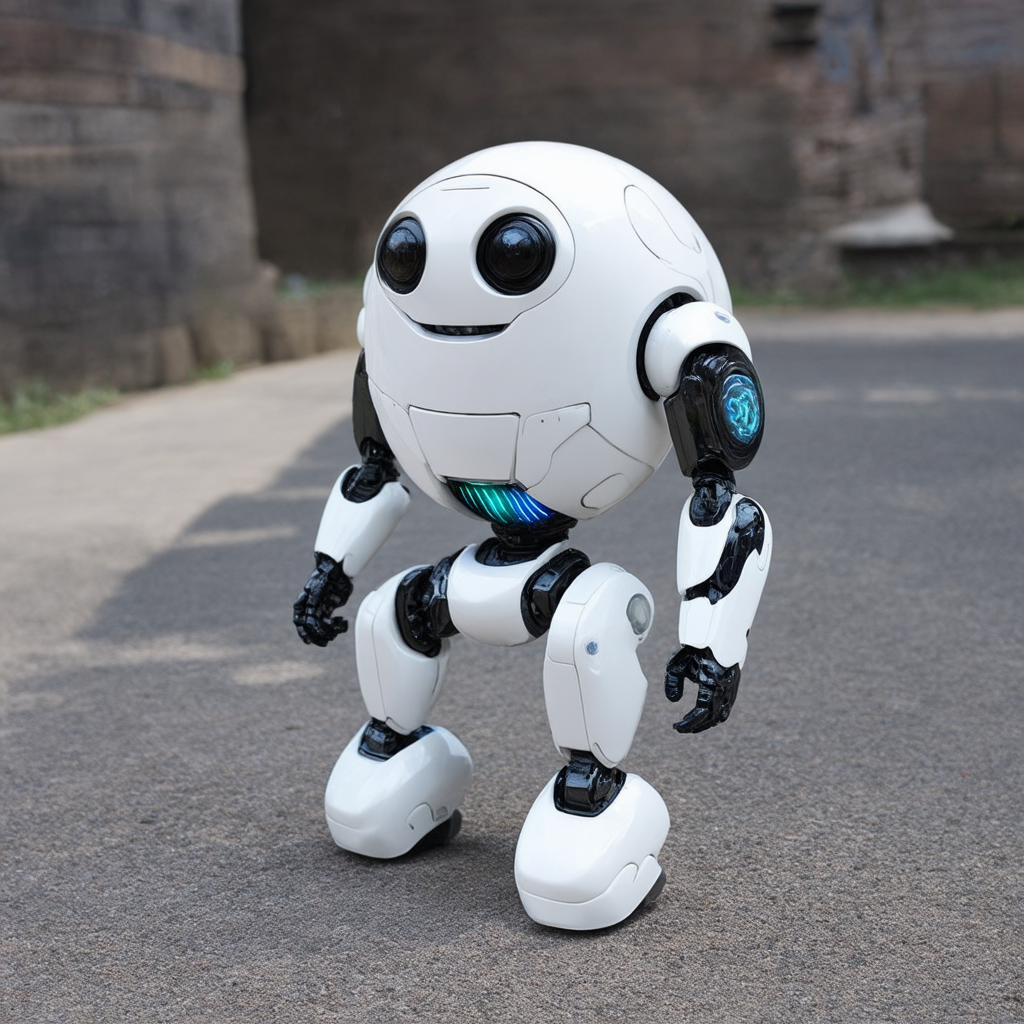
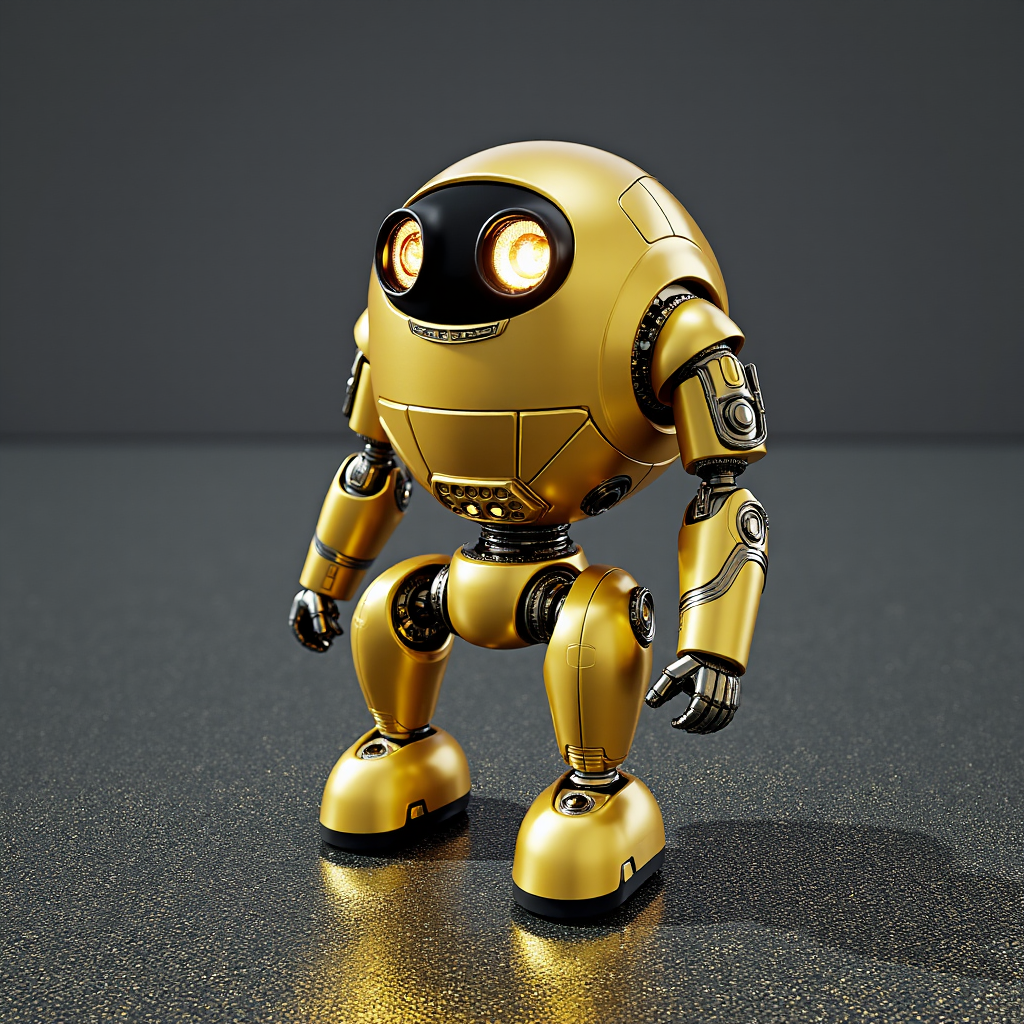
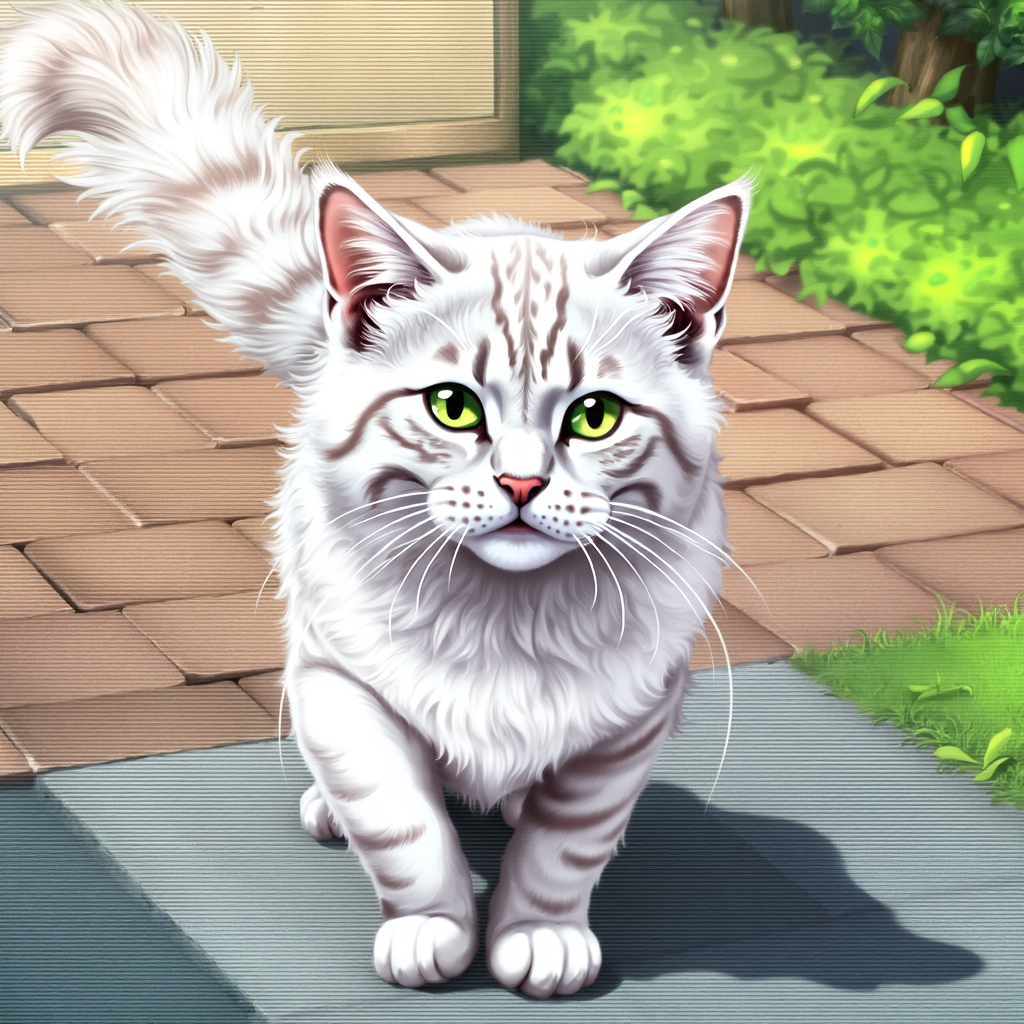
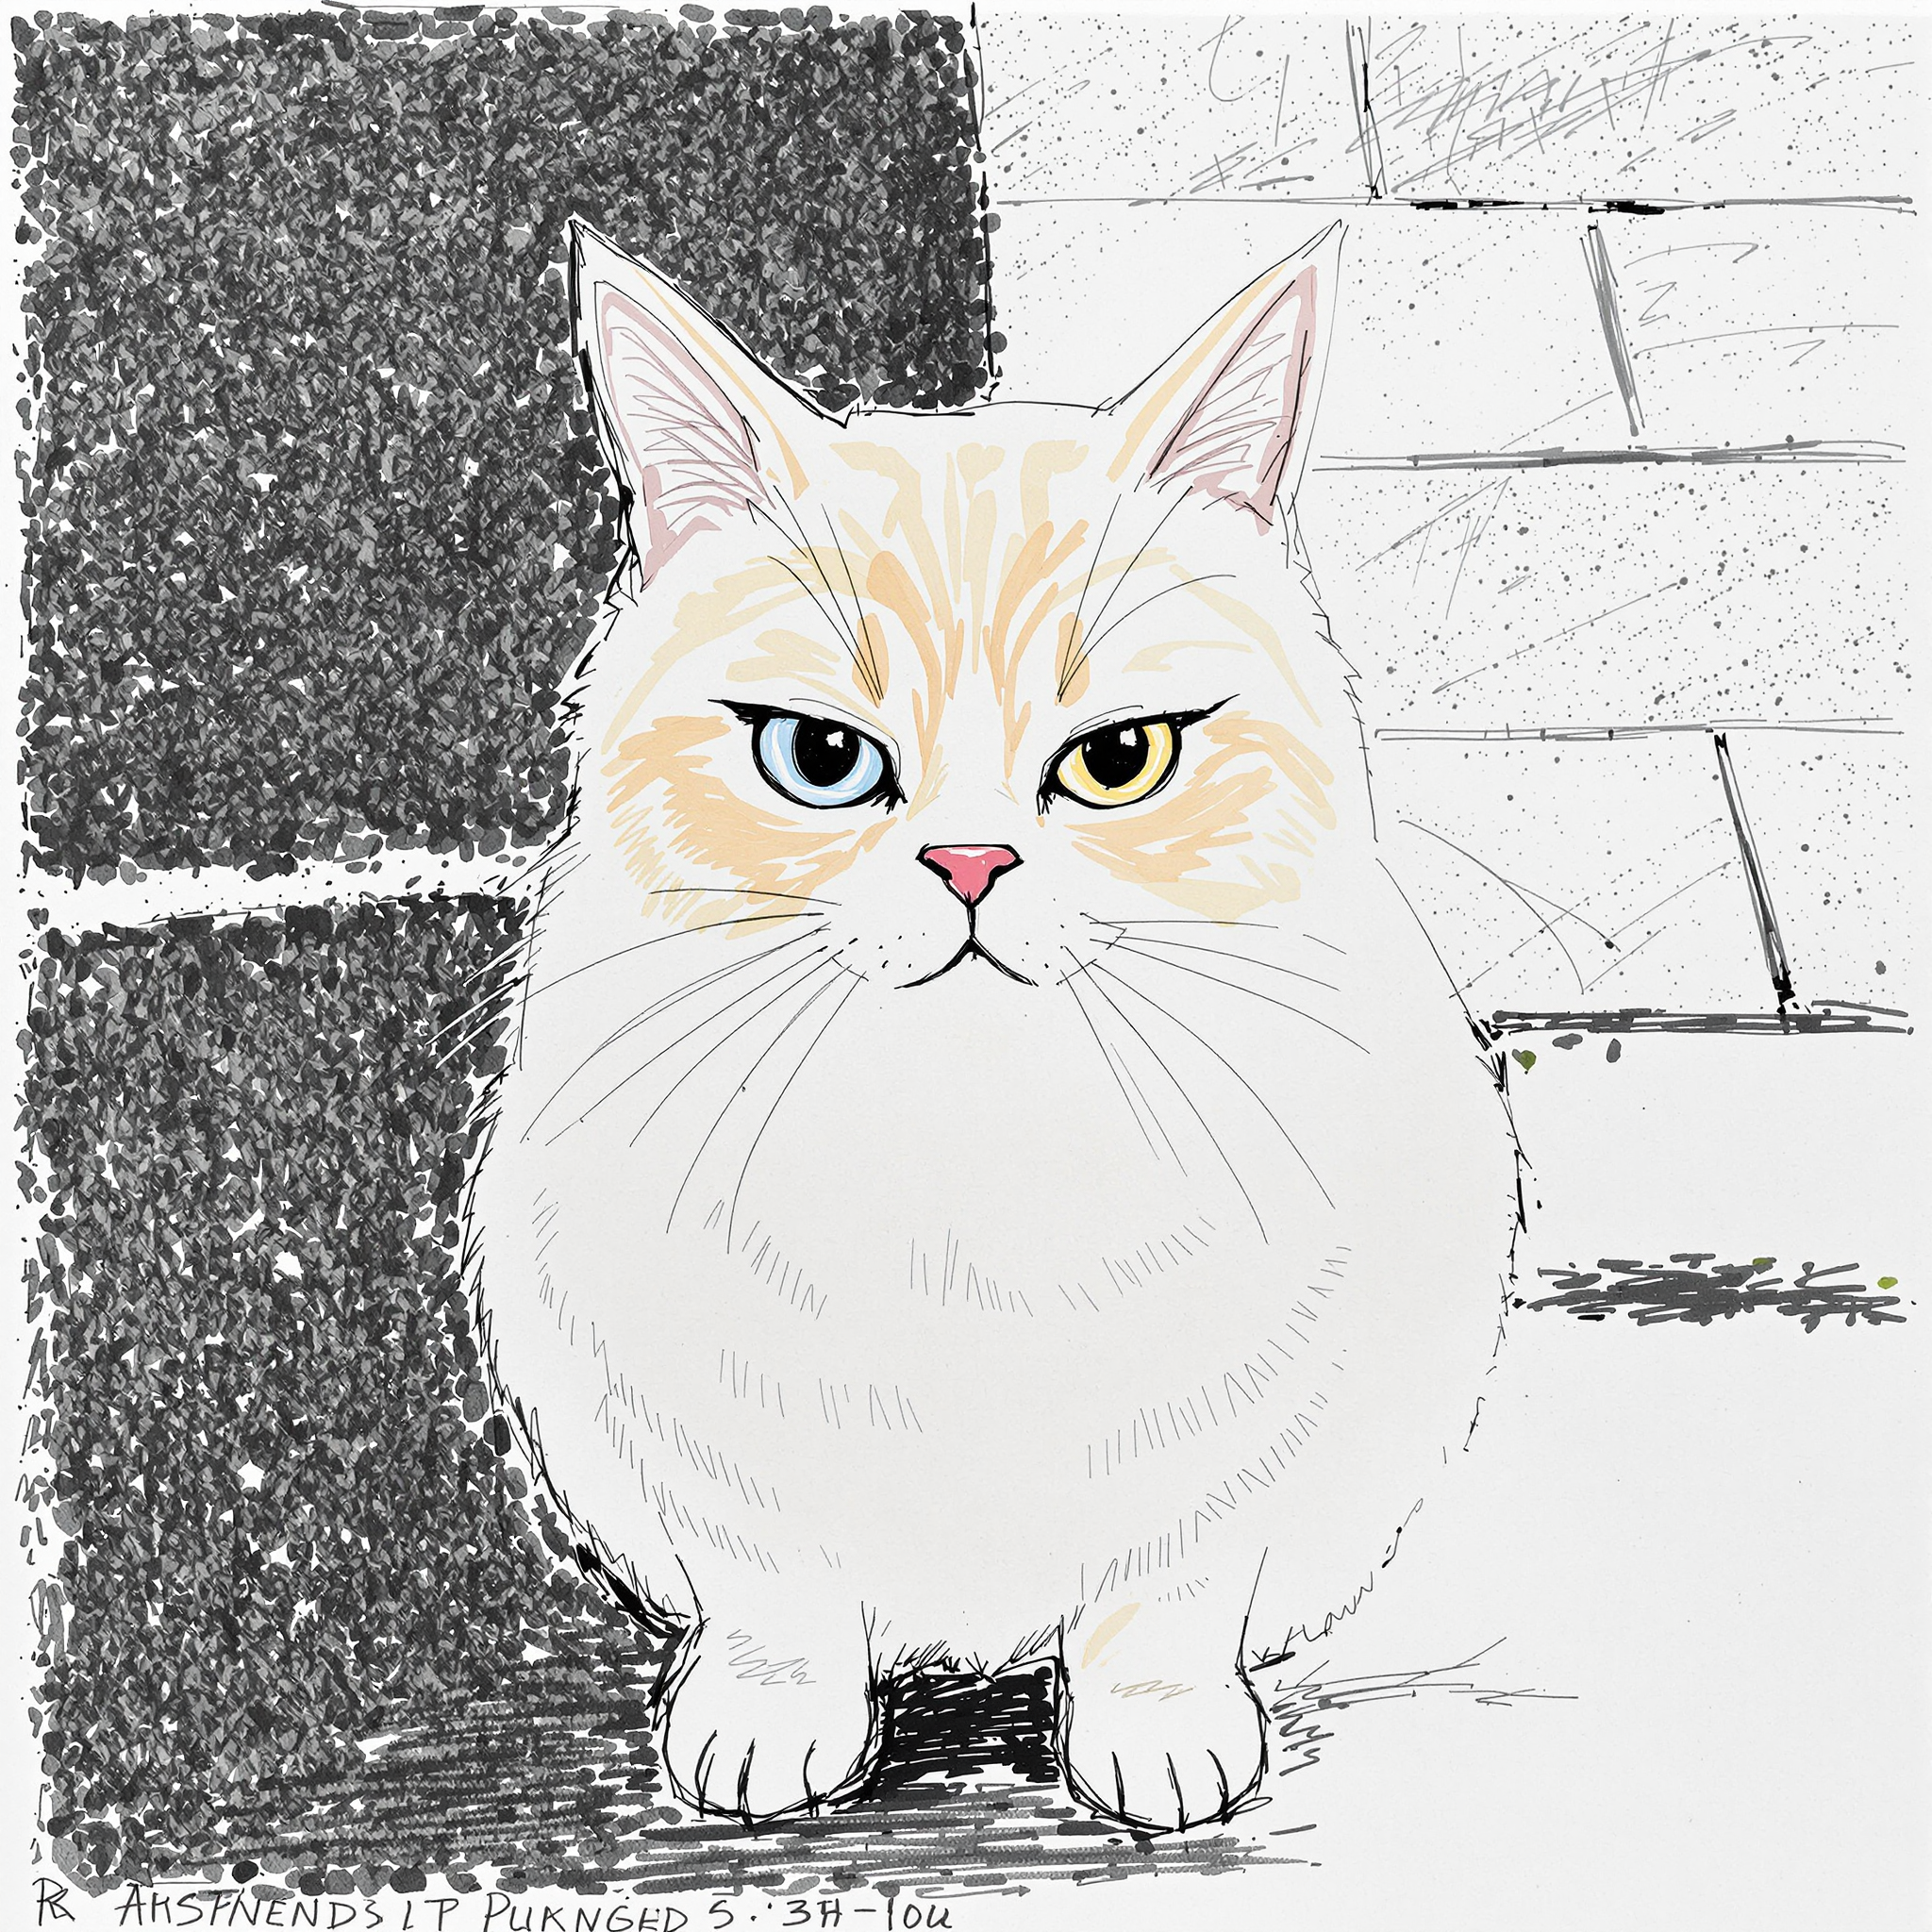
2. 🐱 Create Consistent Characters for Storytelling
If you’re into storytelling, graphic novels, animations, or even brand mascots, GPT Image helps you create visually consistent characters across scenes effortlessly. Keep your protagonist recognizable everywhere—from dramatic adventures to everyday scenarios.

👉 See how easy it is to keep your characters consistent!
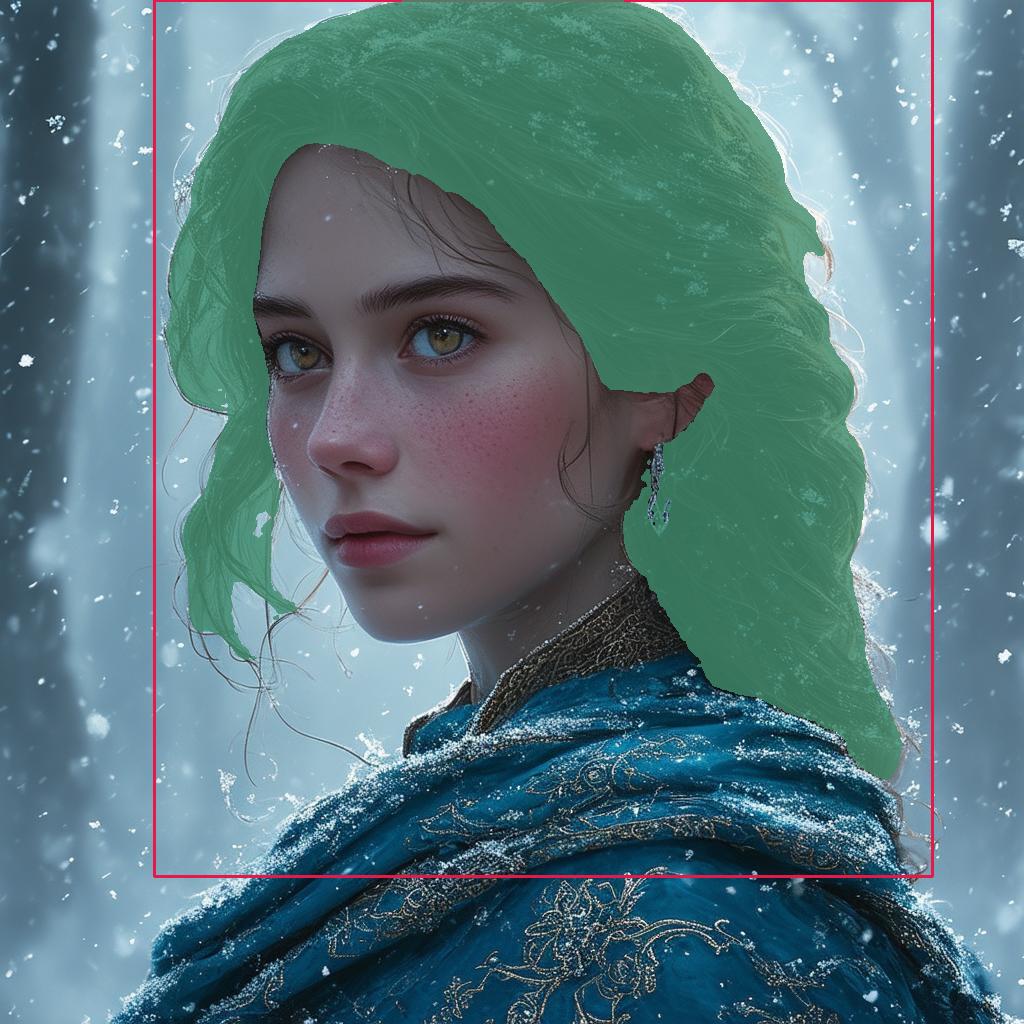
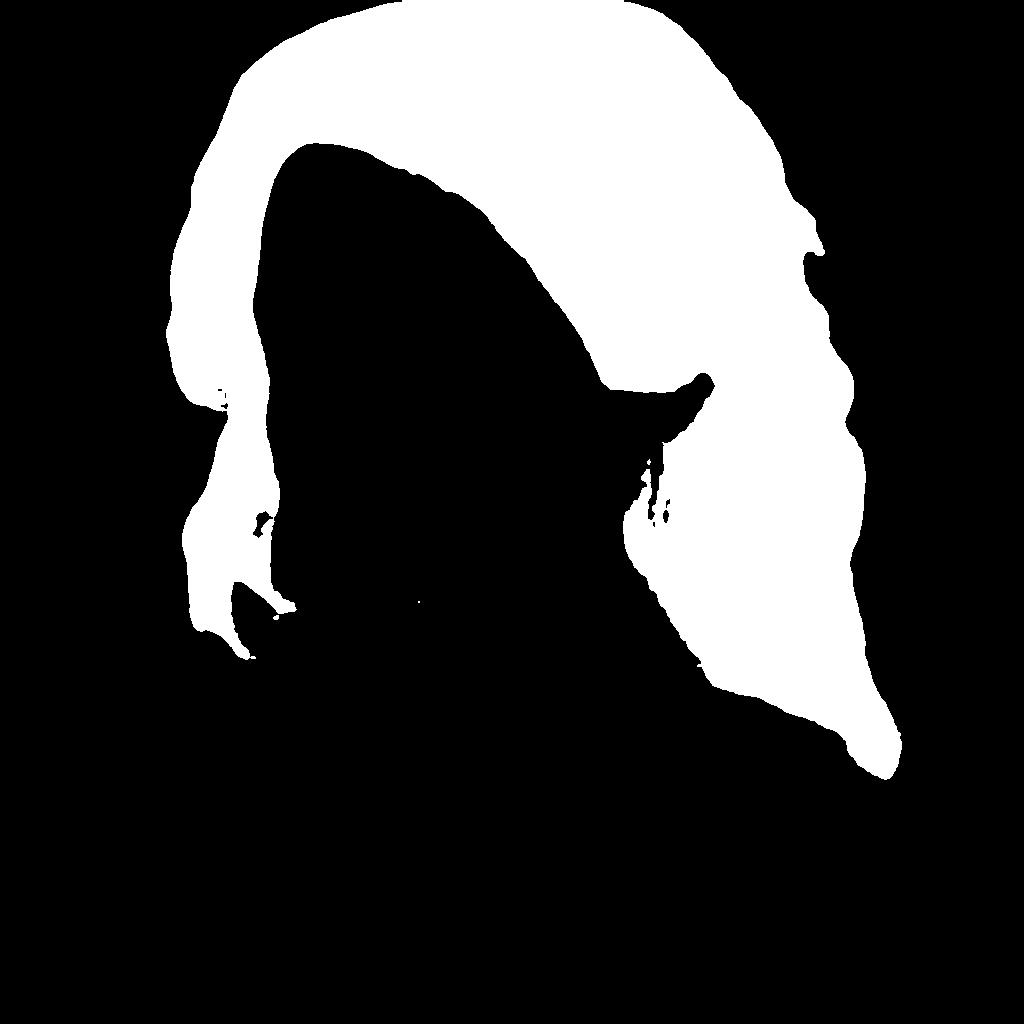
3. 🖼️ Extract Precise Visual Assets
Whether you’re creating graphics for marketing, thumbnails for YouTube, or detailed product visuals, GPT Image excels at precisely isolating visual elements onto transparent backgrounds. This means hassle-free image editing without Photoshop nightmares!

👉 Learn how to easily extract assets with GPT Image!
4. 🎨 Transform Image Styles Instantly
Want your image turned into anime art? Or maybe a classic oil painting? GPT Image can easily transform the visual style of your images. Just drop an image into AI-FLOW, specify your desired style (anime, vintage, cartoon, or watercolor), and watch the magic happen.
Example prompt:
“Convert this photo into vibrant anime style.”
🎯 Ideal for creative social media content, unique branding materials, or personalized artwork!

5. 🚀 Generate Engaging Social Media Graphics
Need quick, high-quality visuals for your social media posts or ads? GPT Image can instantly generate eye-catching graphics tailored to your campaign. From product promos to engaging visuals, keep your audience clicking and liking!
Example prompt:
"Create a vibrant social media graphic featuring a smiling woman using headphones in a bright, energetic style."

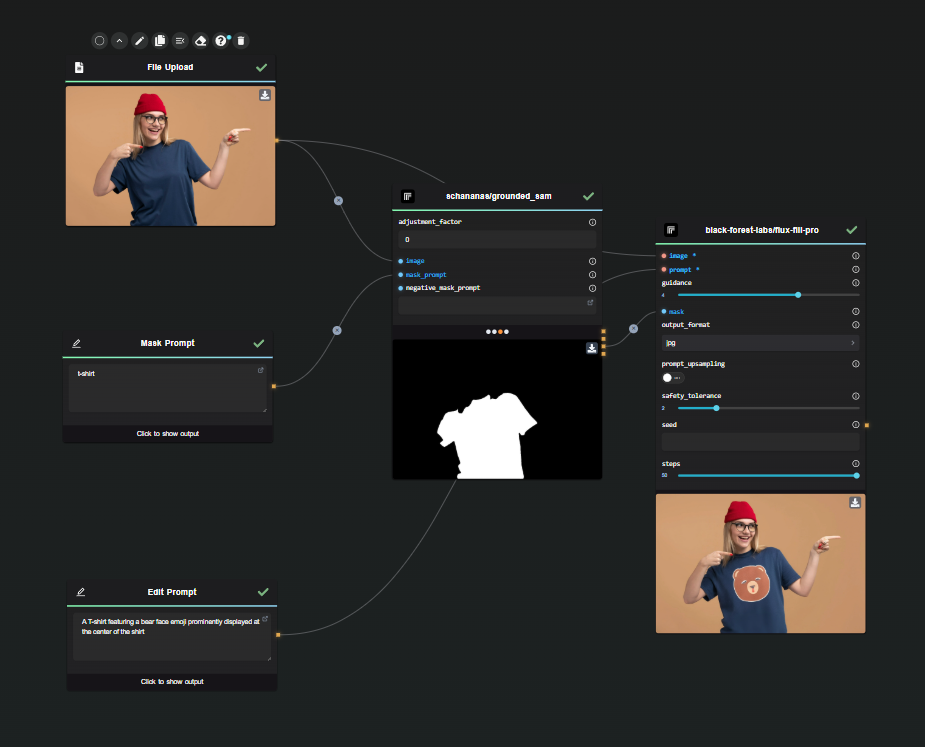
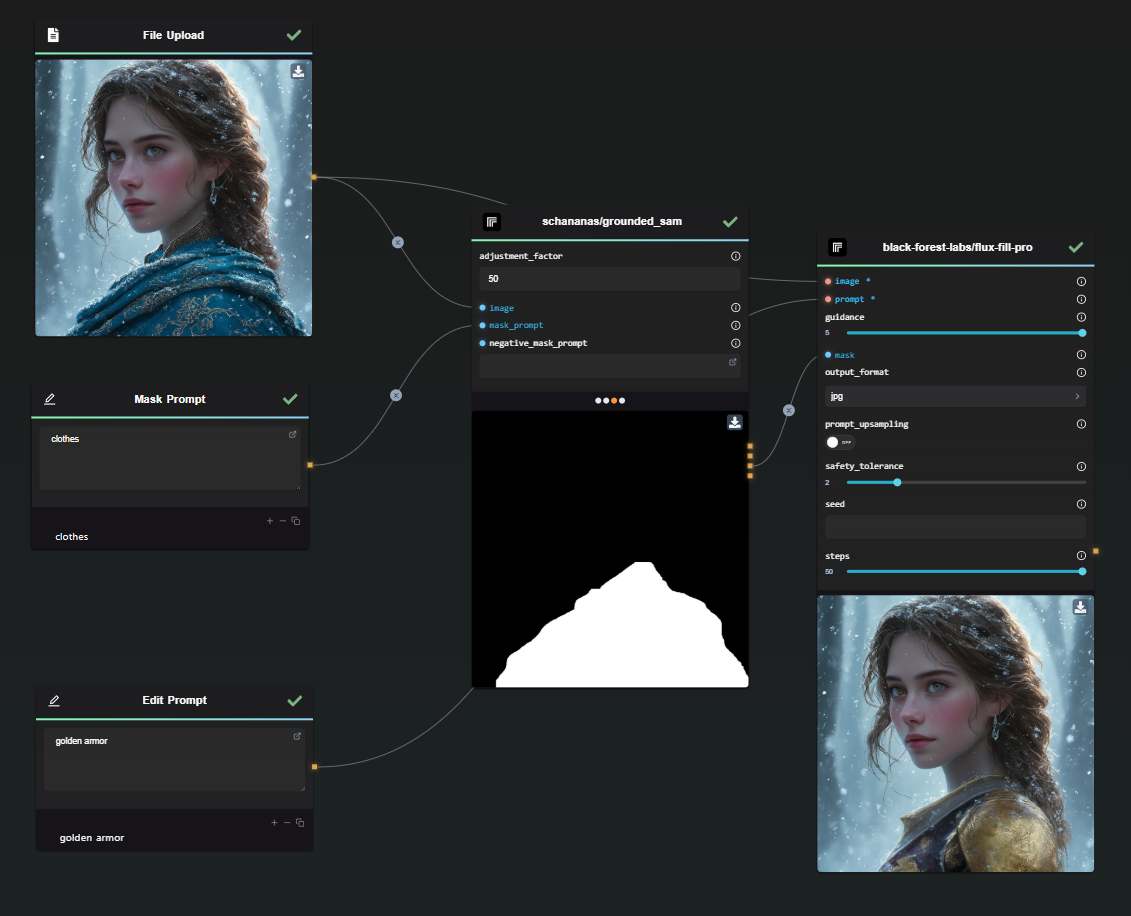
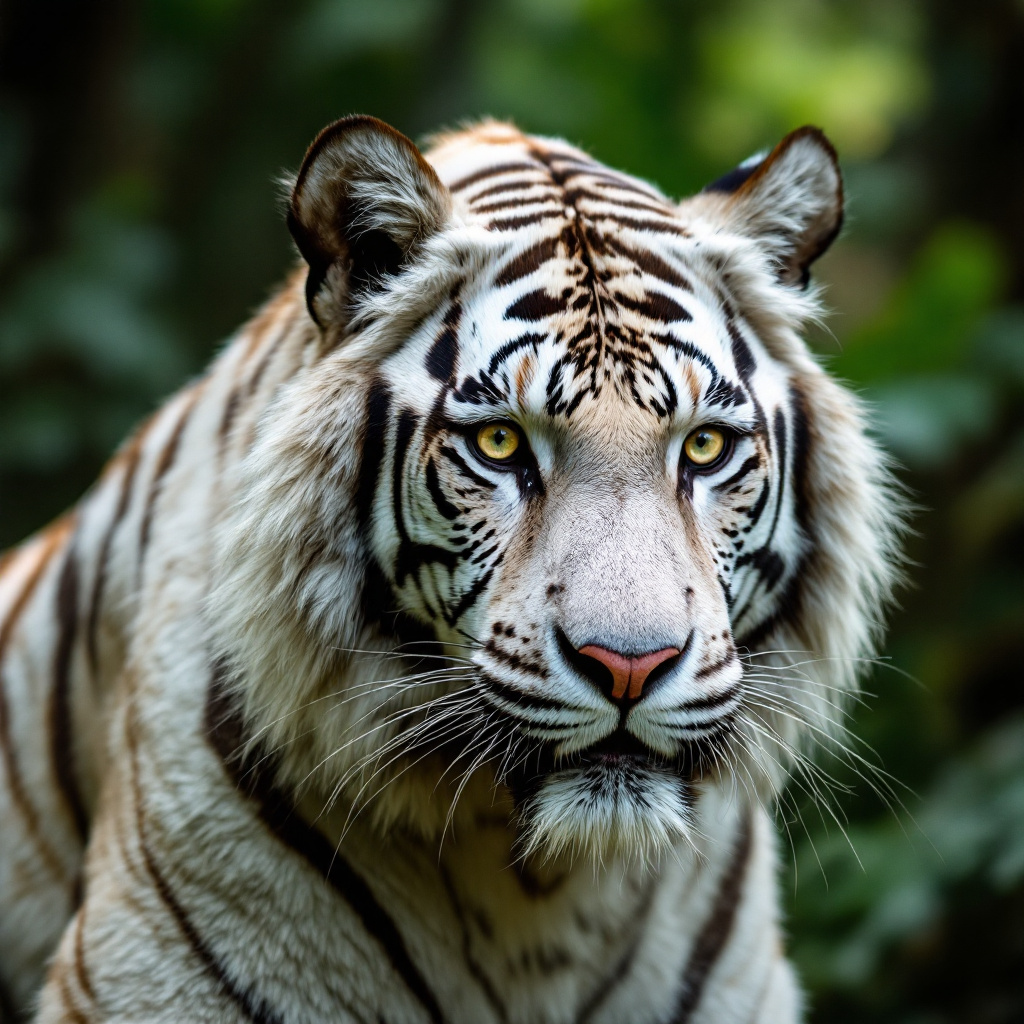
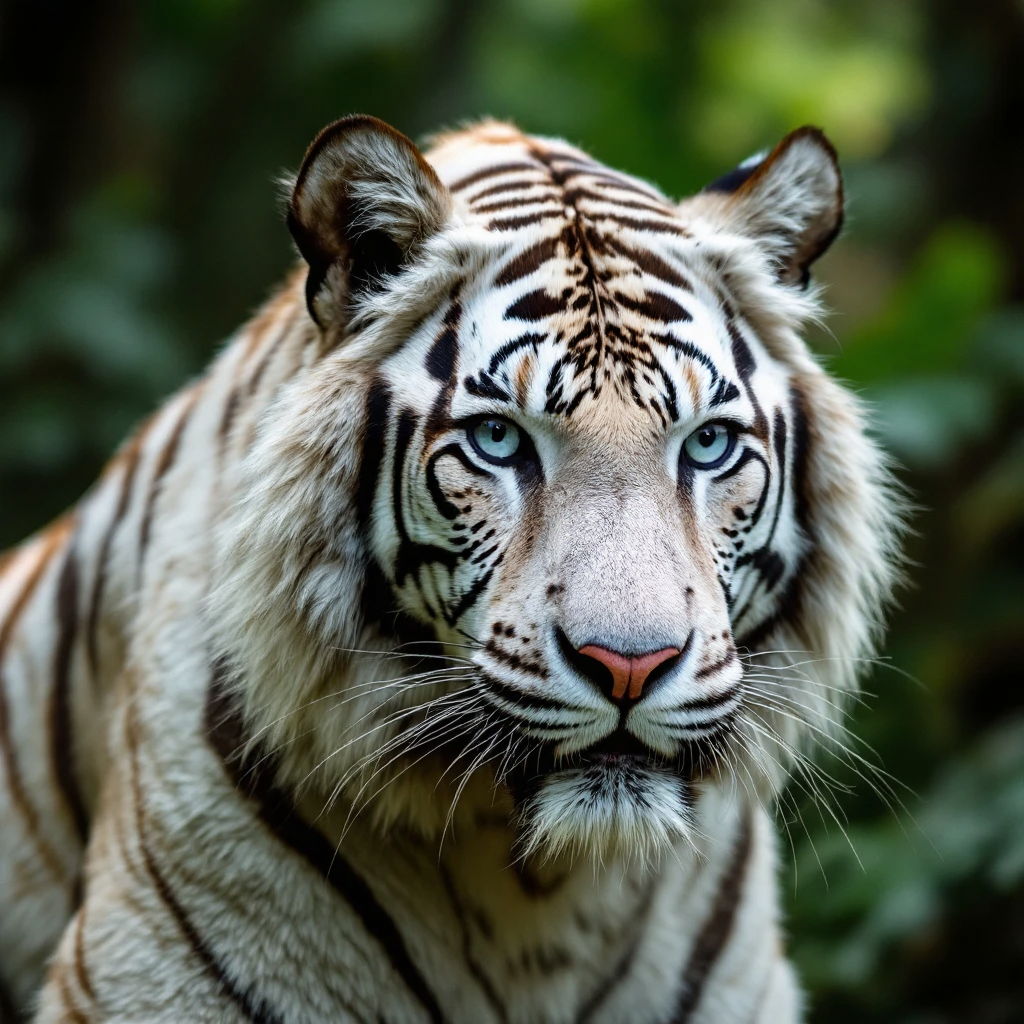
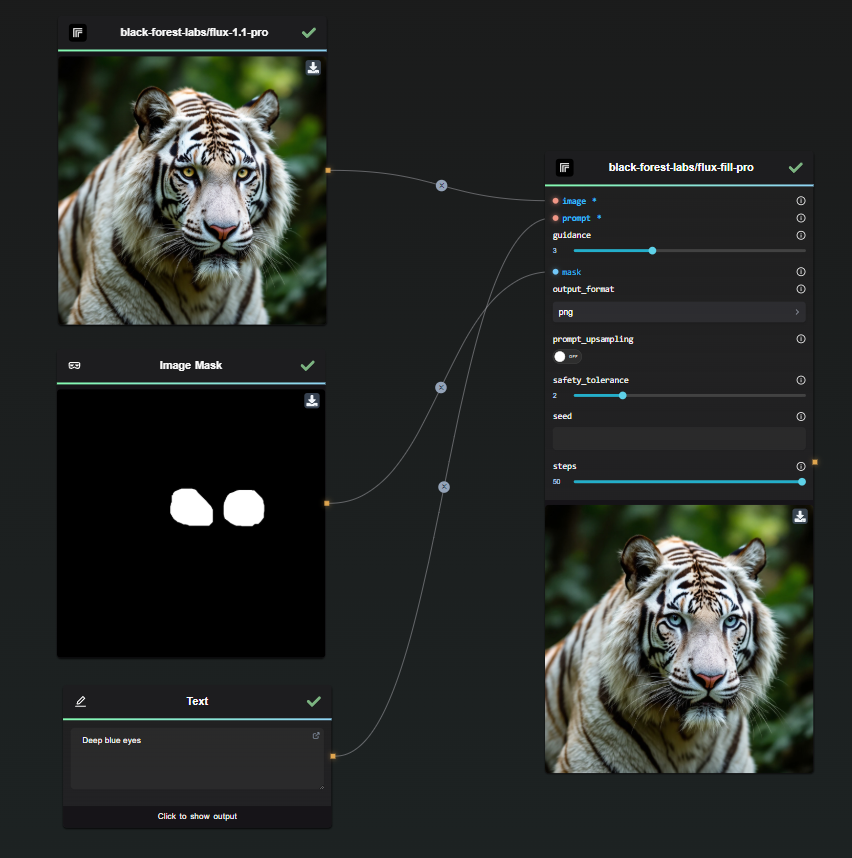
6. ✨ Rapid Editing with or without Inpainting
Whether you're a creator, game developer, or product designer, GPT Image is the perfect tool for quickly prototyping visual concepts. Easily generate multiple visual variations for characters, environments, or new product ideas in just a few steps.
In AI-FLOW, you can use GPT Image in Edit mode, either with or without a mask. When using a mask, the model focuses the edits on the selected areas — perfect for precise adjustments like, for example, adding light blue eyes to a droid cat:

Without a mask, you can also repurpose the same image in a new context. For instance, you can ask GPT Image to add promotional text, ideal for creating engaging social media posts or marketing materials — like this promotional post for a pet droid cat:

7. 📚 Educational Visual Aids & Infographics
Teachers and educators, say goodbye to boring lessons! GPT Image helps you instantly create visual aids, diagrams, and infographics to enhance classroom engagement. Quickly illustrate complex concepts and keep your students hooked.
Example prompt:
"Generate an infographic clearly explaining the water cycle for elementary school students."

🛠️ How AI-FLOW Makes It Easy
The best part? AI-FLOW lets you combine the power of GPT Image with:
- Repeatable workflows: Save your processes and reuse them effortlessly.
- Parallel processing: Generate multiple visuals simultaneously, saving tons of time.
- Custom API keys: Manage your own GPT Image API key directly within AI-FLOW, controlling costs and optimizing usage.
Just drag, drop, and create—no coding required!
✅ Ready to Get Creative?
Whether you're visualizing fashion, extracting graphics, or generating eye-catching content, GPT Image integrated in AI-FLOW is your all-in-one creative solution. Try it out today—creativity awaits!