13 posts tagged with "AI Tools"

View All Tags

· 2 min read
DahnM20

AI-Flow empowers users to automate complex AI workflows by connecting various tools, models, and data sources. Through the Replicate Node in AI-Flow, you can easily access, select, and utilize models from Replicate to enhance your AI workflows.

Replicate Node Overview

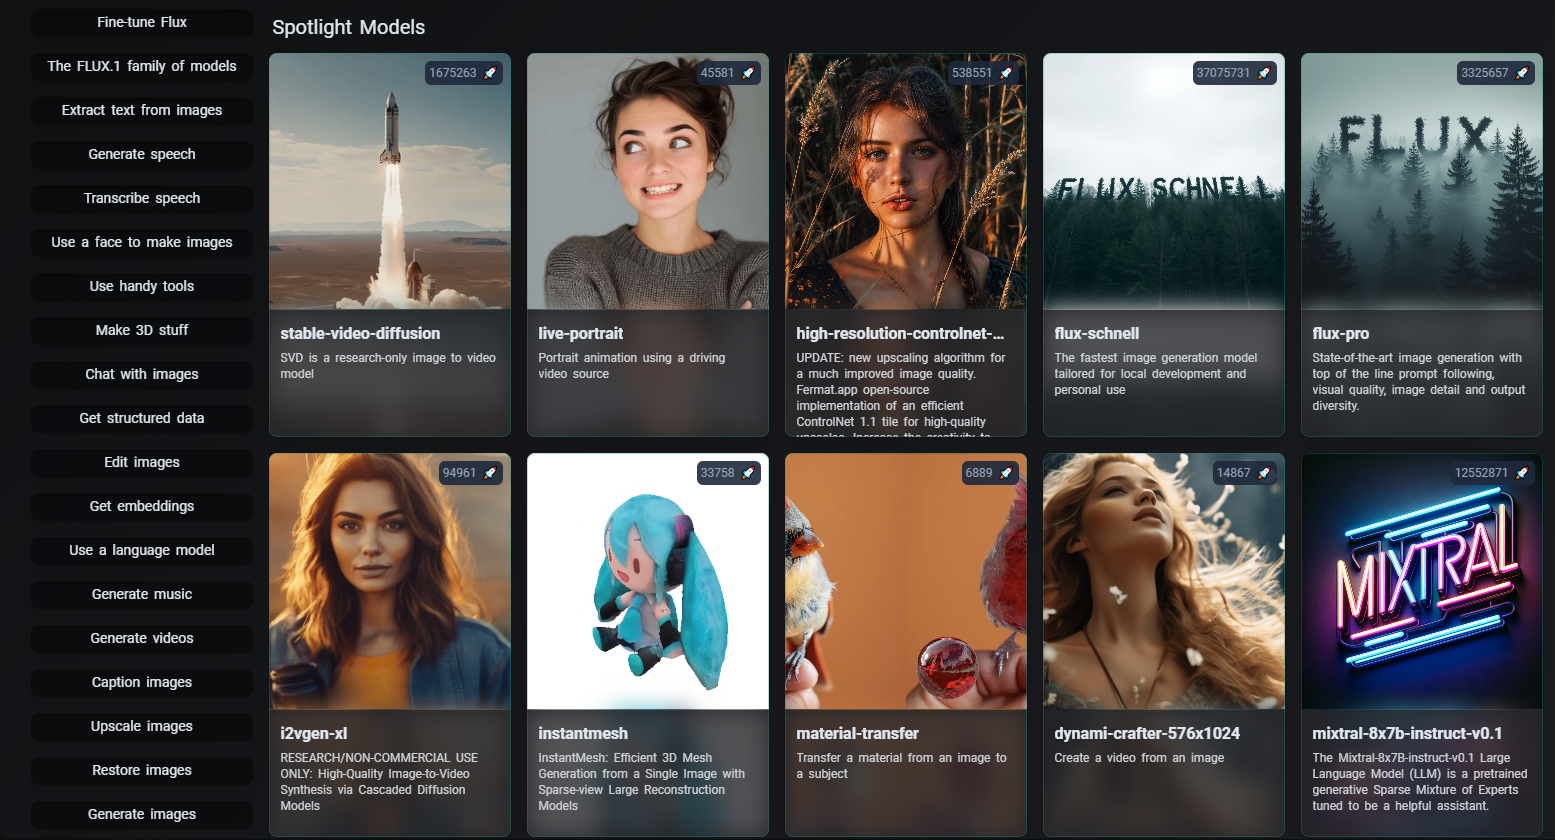
The Replicate Node in AI-Flow serves as a gateway to a multitude of open-source AI models available on the Replicate platform. Replicate allows community members to host and run models in the cloud, and AI-Flow makes it simple to integrate these models into your workflows.

With the Replicate Node, you gain access to a wide variety of models, including text generators, image creators, video processors, and more.

Example Node connection

Spotlight Models and Categories

AI-Flow’s Replicate Node features a curated selection of the most popular models to help users get started efficiently. These "spotlight" models are displayed in the interface for easy access. However, the complete Replicate catalog offers a vast array of additional models that cannot be fully represented within the interface. If you require a specific model not listed, you can easily search for it on the Replicate website and integrate it into AI-Flow by entering the model's ID.

Model Popup

The categorized interface allows for quick navigation, whether you're seeking models for text generation, image creation, or other specialized tasks. However, not all models are fully compatible with AI-Flow due to the diversity in functionality and support across community-hosted models. Despite this, the Replicate Node is designed to make the integration process as seamless as possible, ensuring that you can leverage a wide range of models efficiently within your workflow.

· 4 min read
DahnM20

Unleashing the Power of AI Workflow with API Builder Nodes

Streamlining and integrating AI workflows is now more accessible with the advanced capabilities of the AI-Flow API. By leveraging the API Builder, developers can create robust AI flows, ensuring seamless integration and interaction between various AI models like GPT, DALL-E, Claude, Stable Diffusion, or any Replicate model. This article delves into the core features of the AI-Flow API Builder, demonstrating its benefits and ease of use.

API Builder Overview

Streamline Your AI Flow with API Input and Output Nodes

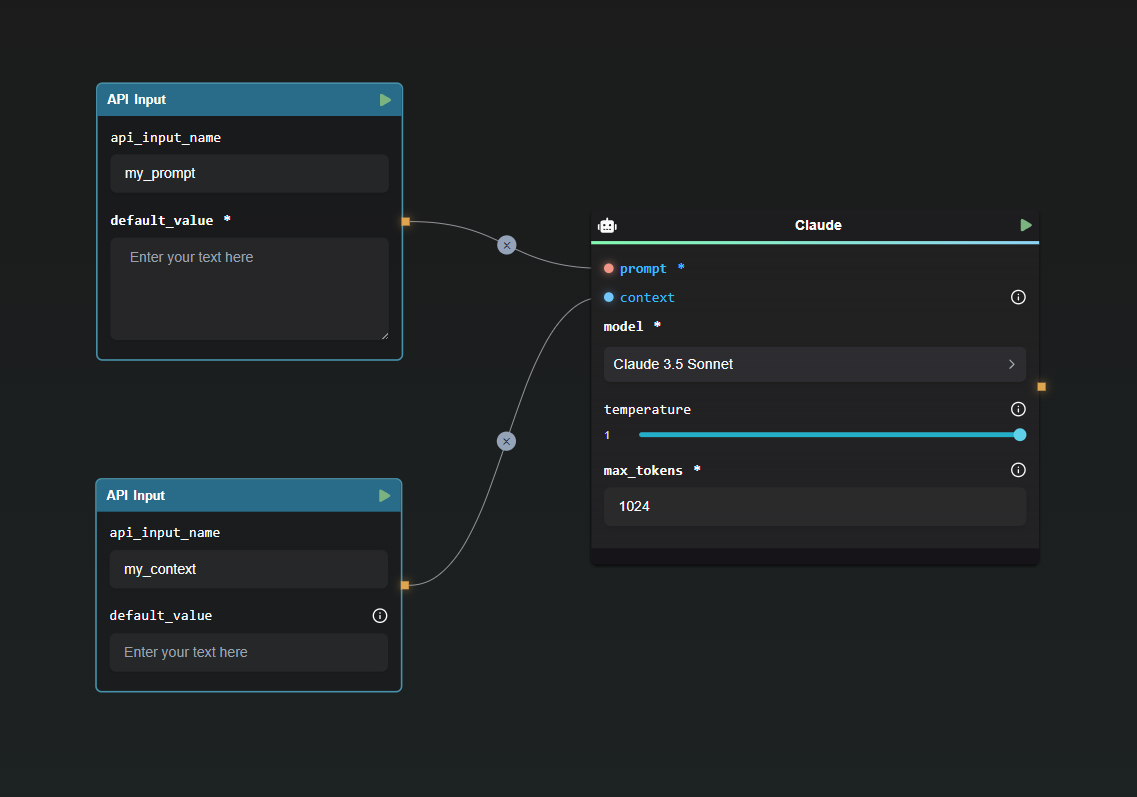
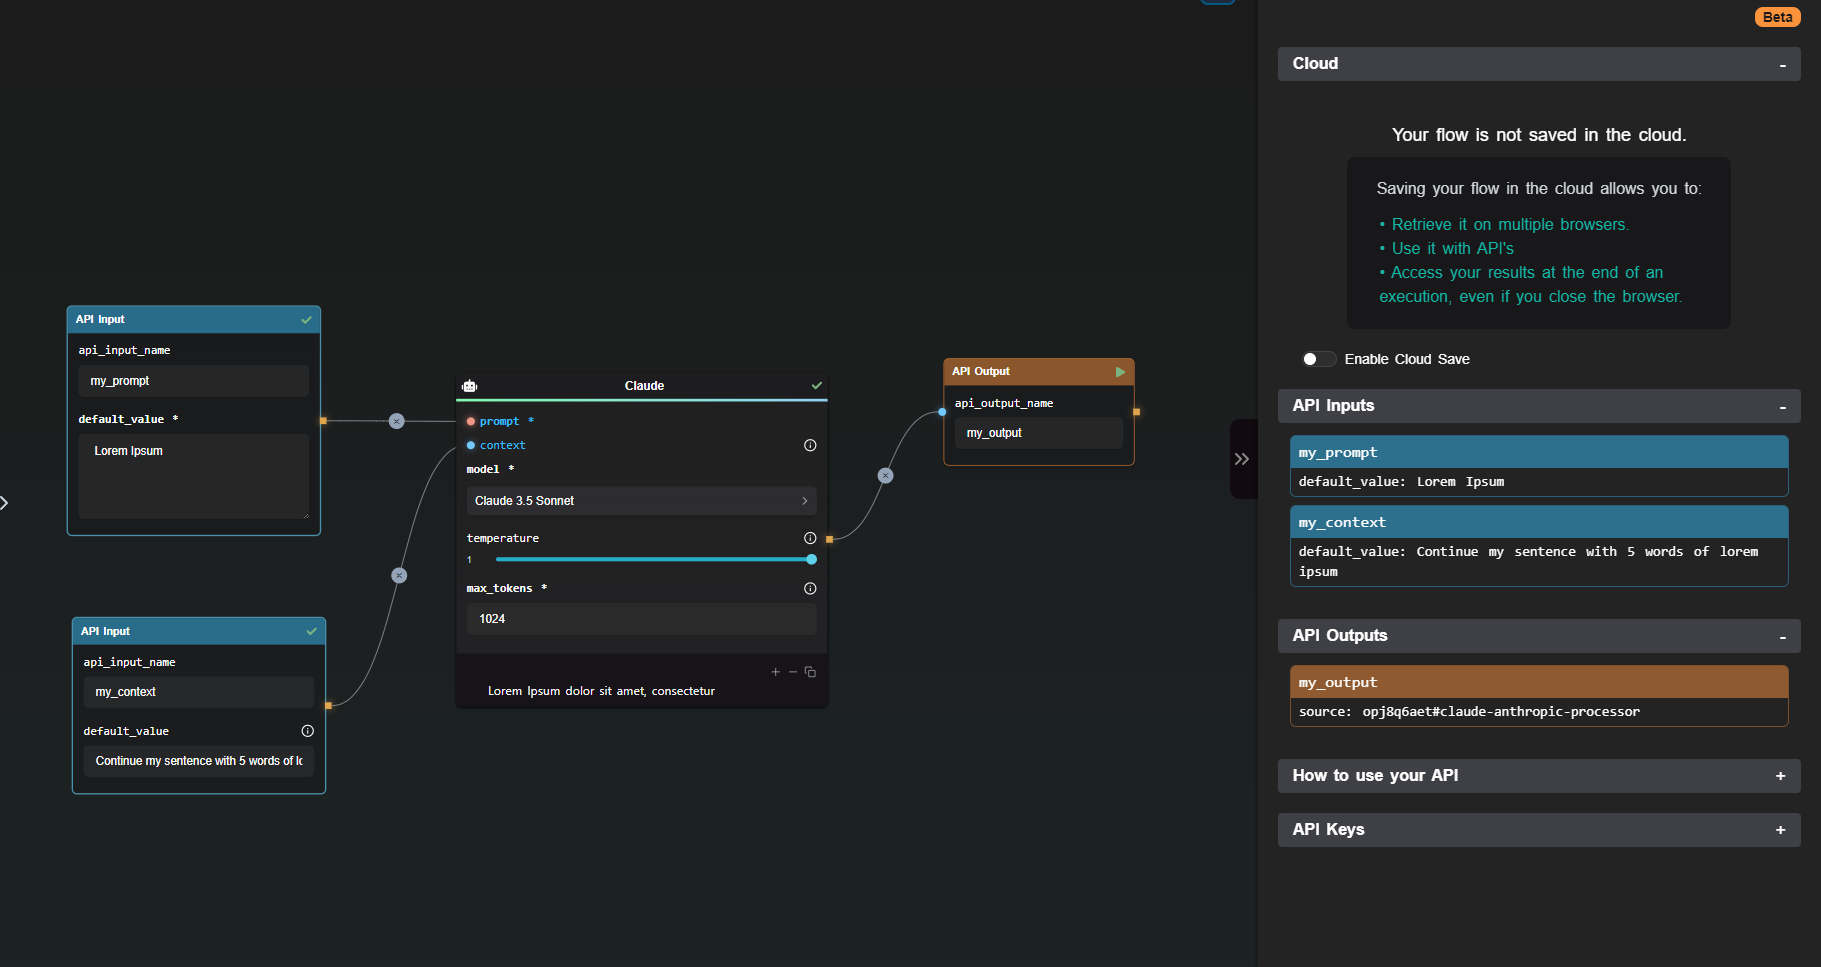
API Input Node: The API Input Node is designed to define the inputs for your API, mapping each field in the request body to a corresponding node in your flow. By setting default values, developers can make certain parameters optional.

API Input Node Example

Example Configuration:

{
"my_prompt": "Lorem Ipsum",
"my_context": "Lorem Ipsum"
}

This configuration showcases how inputs are structured, making it straightforward to initiate the flow with clear, defined parameters.


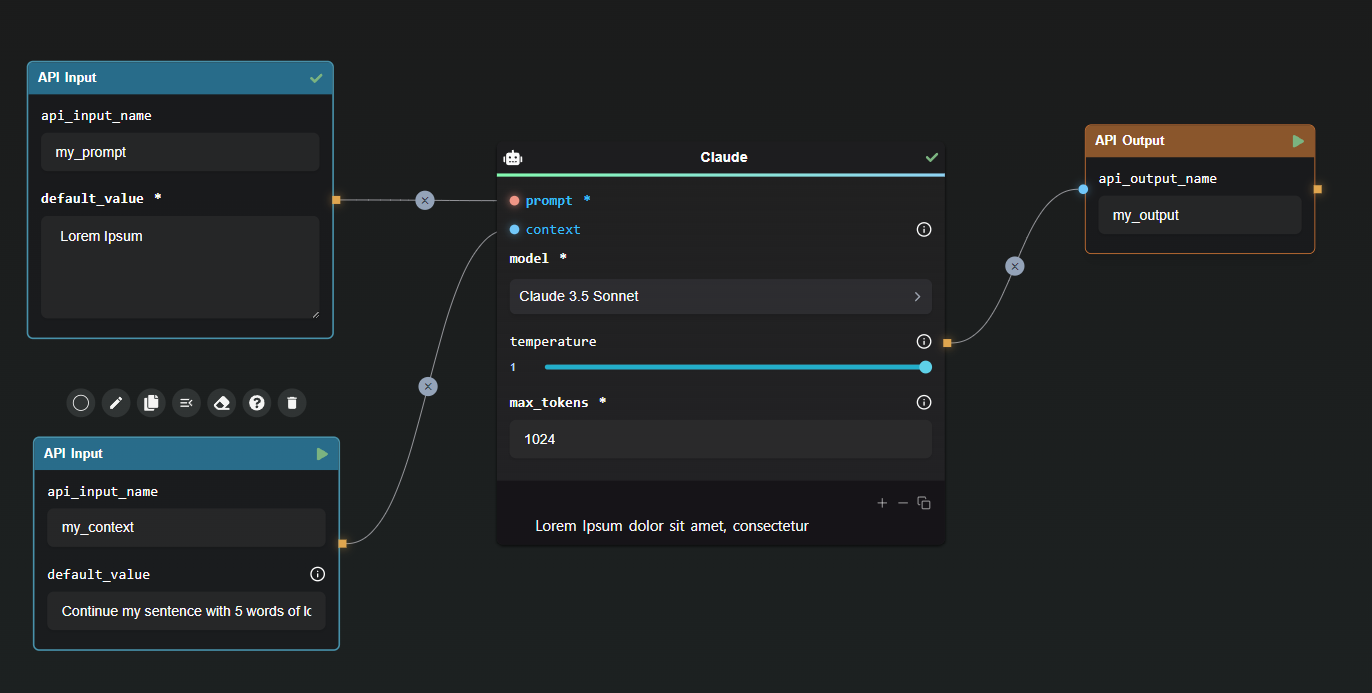
API Output Node: Configuring the API Output Node is very simple. This node specifies the names of the fields in the final response, ensuring the output is structured and understandable. Multiple output nodes can be set to pass additionnal or intermediate results.

API Output Node Example

In this simple example, the API response will be formatted as followed:

{
"my_output": "Lorem Ipsum dolor sit amet, consectetur"
}

This example demonstrates the simplicity of output configuration, providing a clear and concise response structure.

Manage and Monitor Your API with the API Builder View

The API Builder View is your command center for managing and monitoring your AI Workflow API. Accessible through the right pane of the app, this view provides a comprehensive overview of your API configuration, allowing you to generate and manage API Keys seamlessly.

API Builder View

Generating API Keys: To ensure secure access, API Keys are generated within the API Builder. These keys, essential for authorizing requests, are displayed only once to maintain security. Including these keys in your requests as an Authorization header is crucial for successful API calls.

Running Your Flow through the API: Launching your flow is straightforward with the provided code snippets in the API Builder View. For instance, using cURL, you can initiate your flow as follows:

curl https://api.ai-flow.com/v1/flow/<your_flow_id>/run \
-H "Content-Type: application/json" \
-H "Authorization: Bearer $AI_FLOW_API_KEY" \
-d '{
"my_prompt": "Lorem Ipsum",
"my_context": "Continue my sentence with 5 words of lorem ipsum"
}'

This command initiates the flow, returning a run ID to track the process. Retrieve the results using this ID once the processing completes.

Enhance Integration with Webhook Nodes

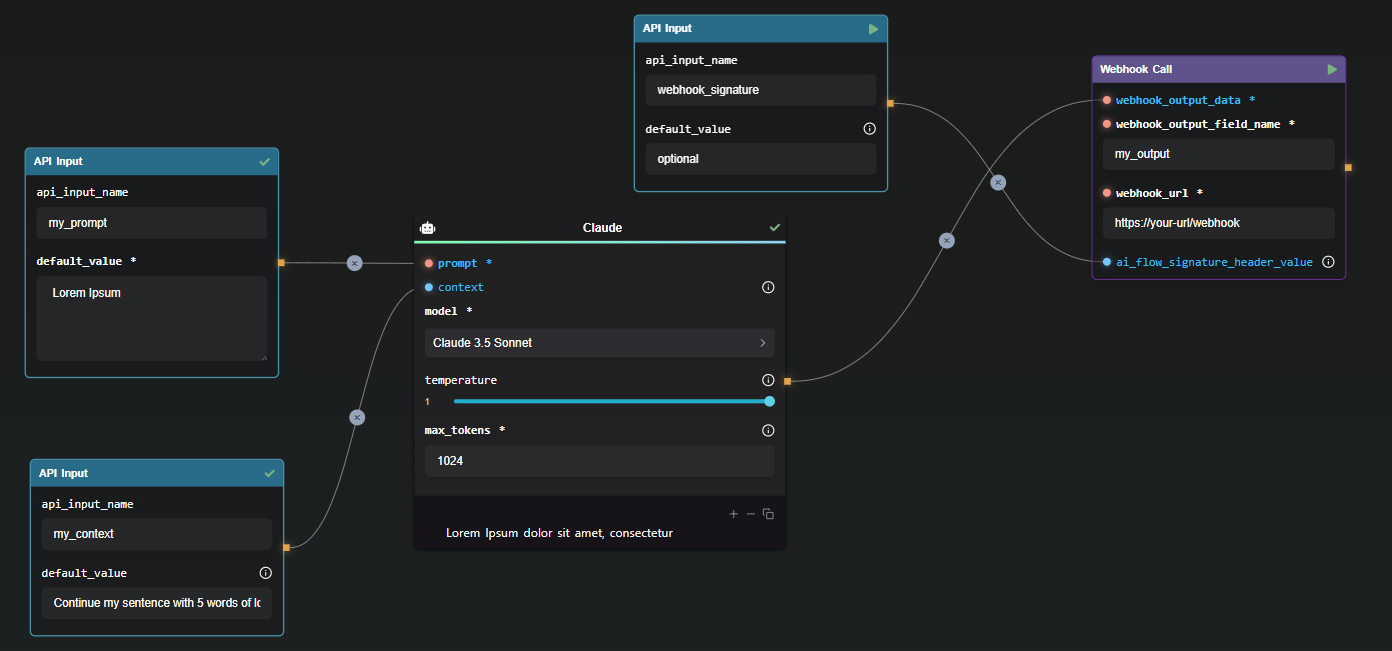
The Webhook Node is a versatile tool within the API Builder, enabling you to send outputs to designated URLs. Configuring the Webhook Node involves specifying the target URL and selecting the outputs to send, with the option to include custom signatures for enhanced security.

Webhook Node Example

In this case, the webhook will send the following data :

{
"my_output": "Lorem Ipsum dolor sit amet, consectetur"
}

In this configuration, the Webhook Node sends structured data to the specified URL, ensuring smooth integration and authentication via custom signatures.

Conclusion

The AI Workflow API, powered by the API Builder Nodes, offers a streamlined, efficient way to create and manage AI flows. With intuitive nodes for input and output, API management tools, and flexible webhook configurations, developers can build powerful AI workflows tailored to their needs.

Additional Resources

For more detailed information, refer to the following resources:
· 4 min read
DahnM20

Generate Consistent Characters Using AI: A Comprehensive Guide

Are you looking to create consistent and cohesive characters in your AI-generated images? This guide will walk you through practical methods to achieve uniformity in your AI character generation, part of our broader challenge on How to Automate Story Creation.

The Challenge of Consistent AI Image Generation

AI-powered image generation is a powerful tool, but it often introduces a level of randomness. This means you might need to generate images multiple times to get a convincing result. This guide doesn't present state-of-the-art techniques but rather shares my own experiments to help you achieve more consistent character images.

While the methods discussed are not foolproof, they represent a series of experiments that can guide you in developing your own approach to consistent AI character generation.

Method 1: Precise Prompt Descriptions

One of the keys to successful image generation is crafting high-quality prompts. If your descriptions are precise and consistent, you’re more likely to achieve similar results across multiple images.

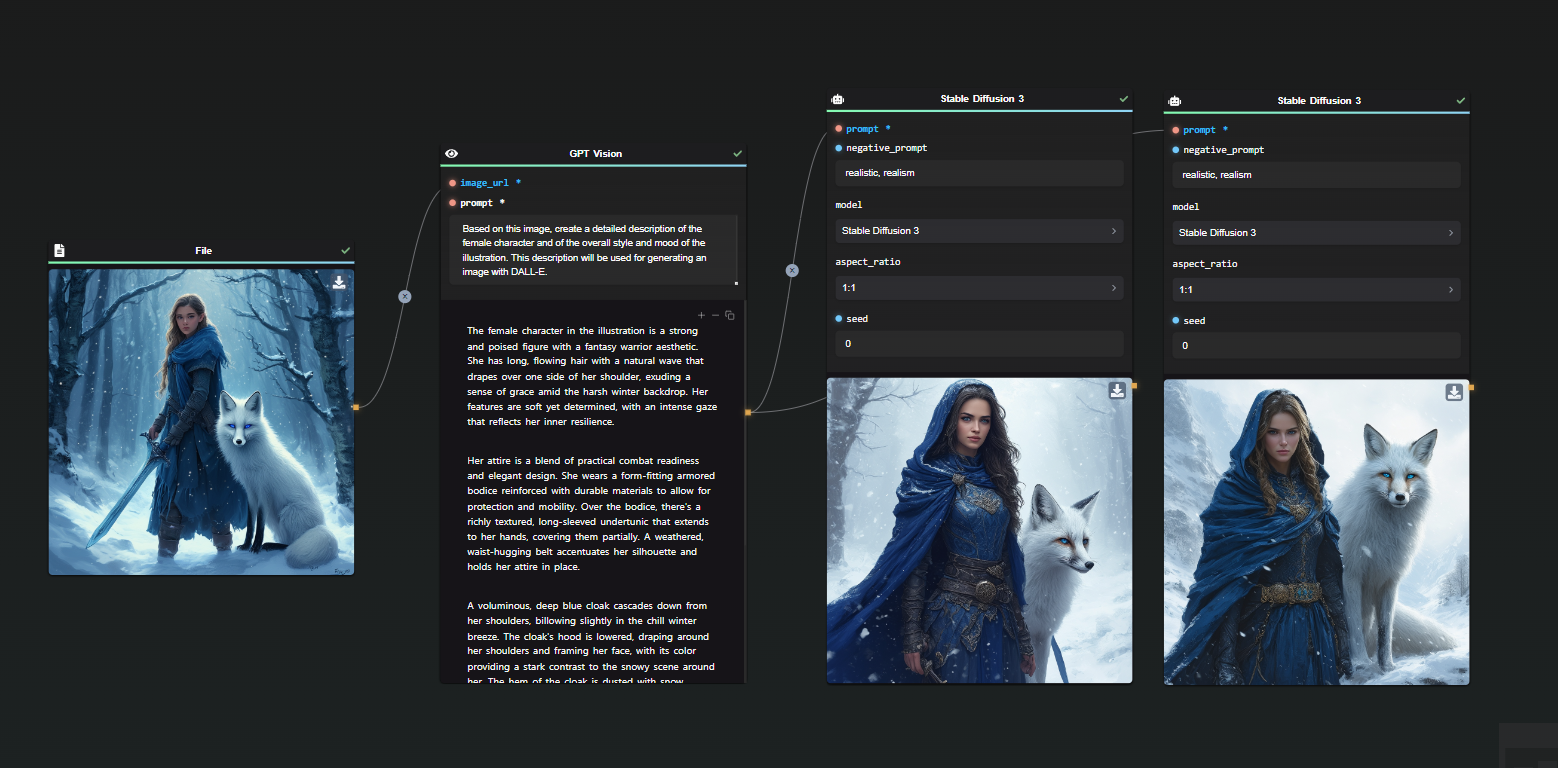
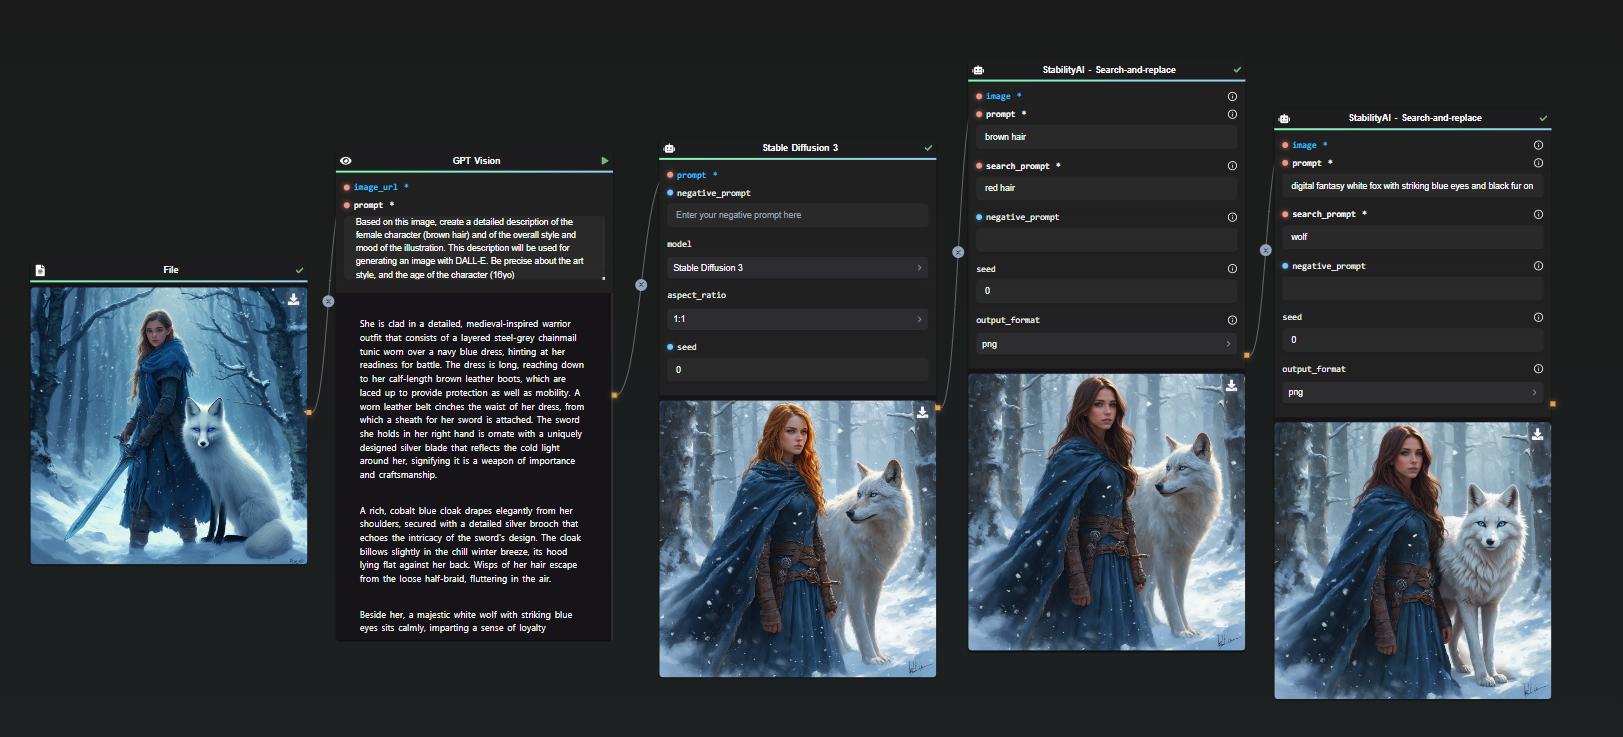
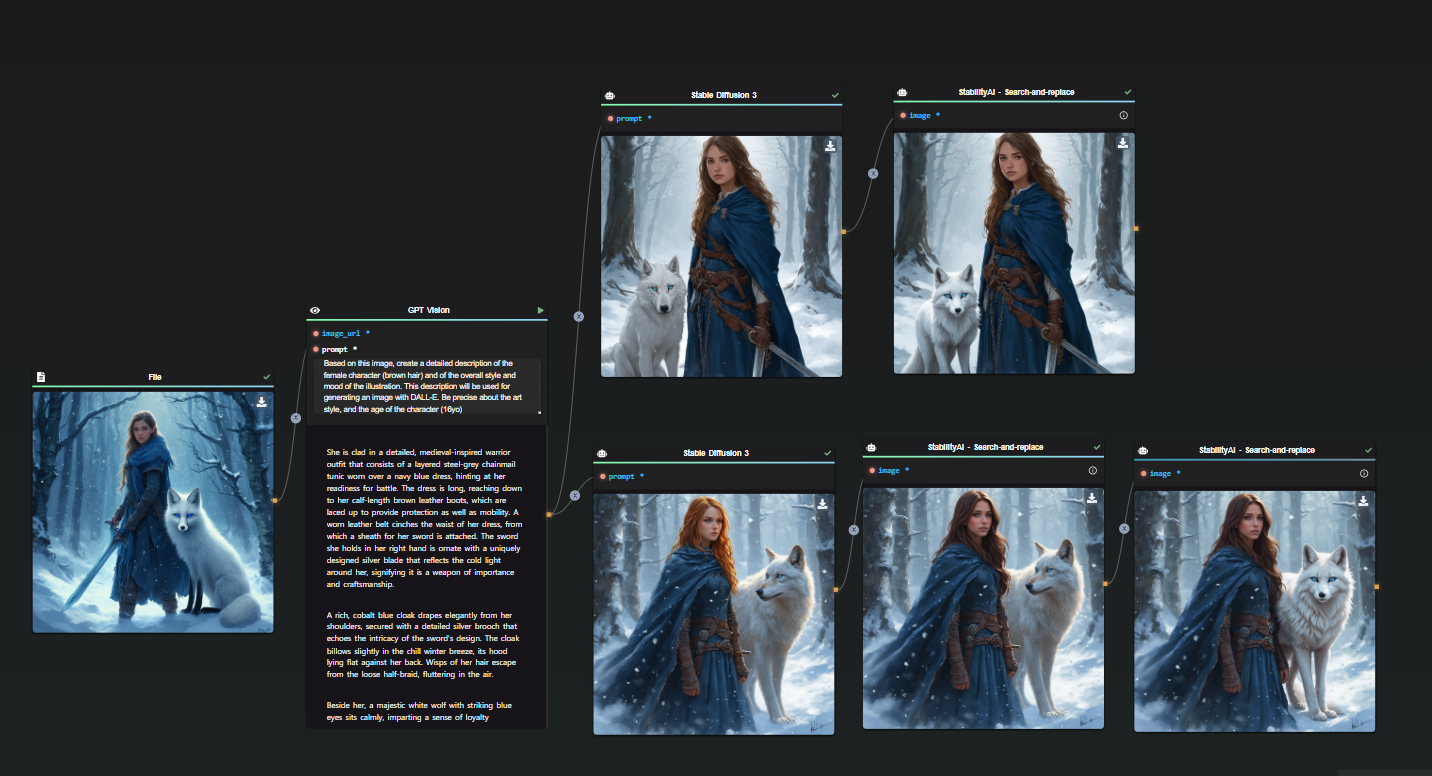
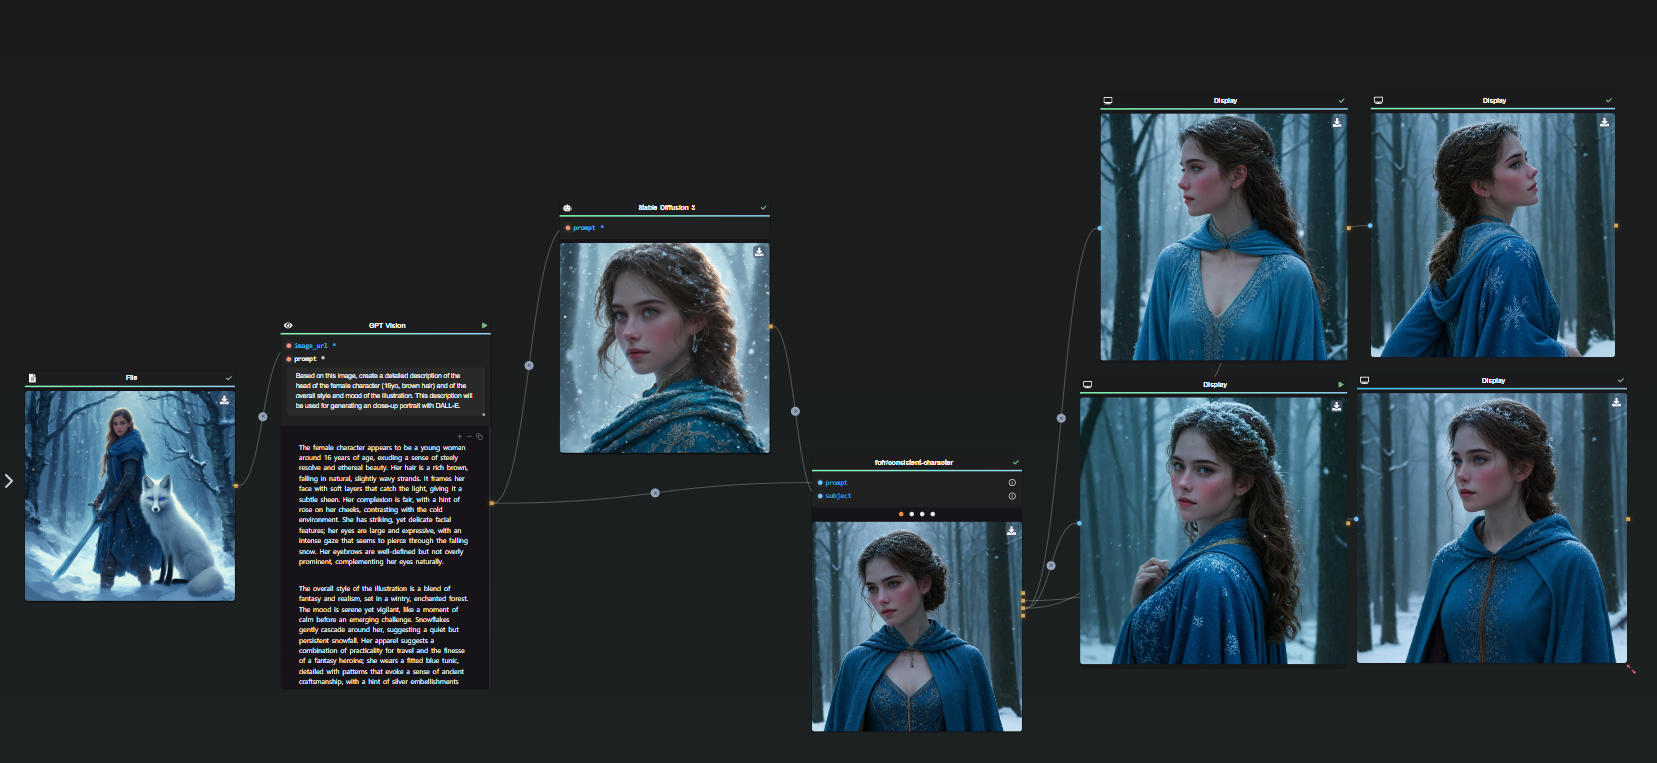
Given our challenges with precision, we’ll use AI to assist in generating detailed descriptions. For example, I started with an image previously generated and asked ChatGPT to describe it accurately. This description was then used as a prompt for Stable Diffusion 3.

First Generation

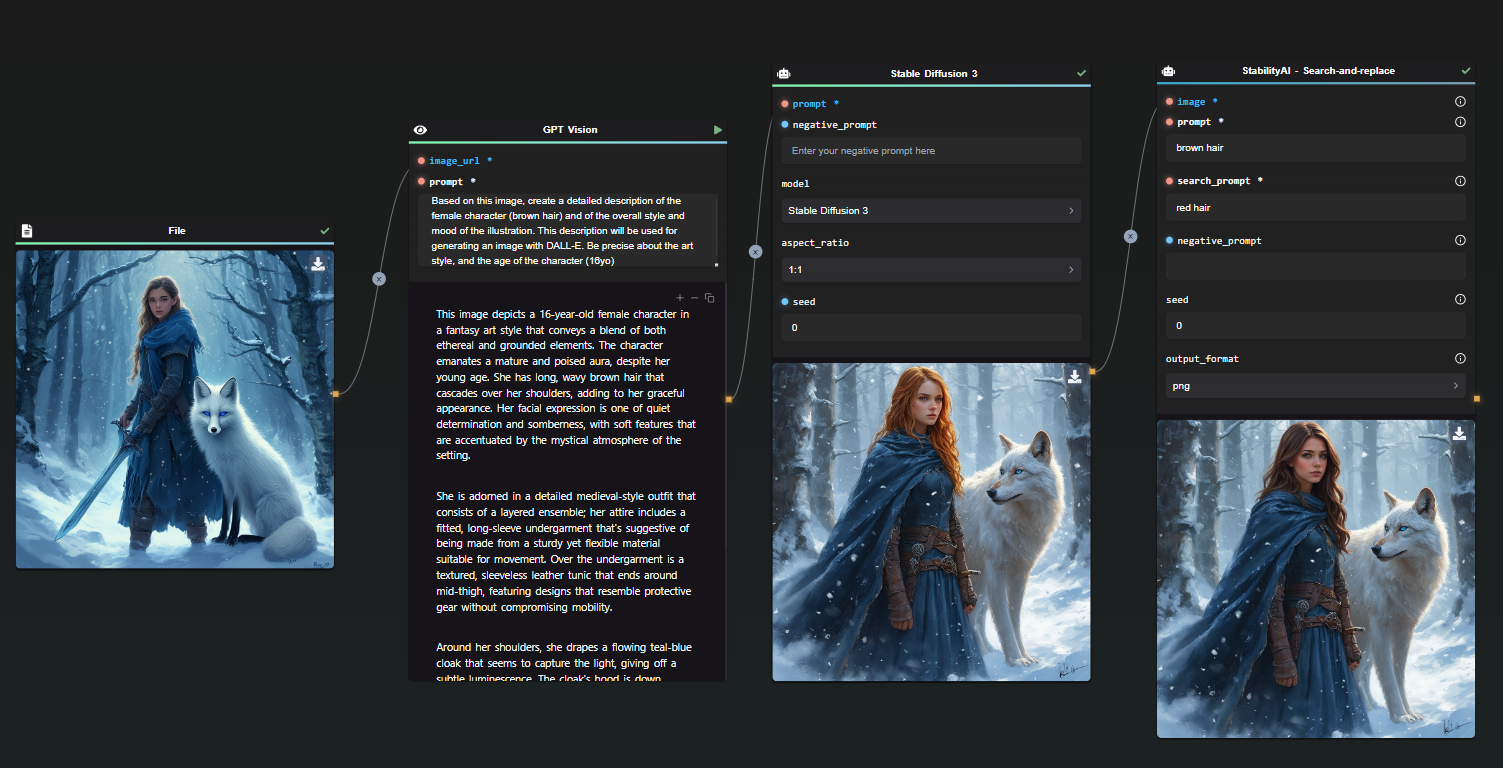
Despite some similarities, the AI missed certain details, such as the character's age. By updating the prompt to specify that the character is 16 years old, we achieve better consistency.

Second Generation

In this iteration, the AI misinterpreted the hair color due to lighting effects in the original image. Using StabilityAI’s Search and Replace feature, I swapped red hair for brown hair and refined the description.

Third Generation

Here's a quick fix for the character's pet, again using the Search and Replace feature.

Fourth Generation

With the revised prompt, including specific details about hair color and other features, the results are more consistent at the beginning in the new iteration.

Method 2: Creating a Consistent Face Template

Once you have a consistent character concept, ensuring the face remains consistent across different angles and expressions can be challenging. To address this, create a clear face template that can be used to correct other images.

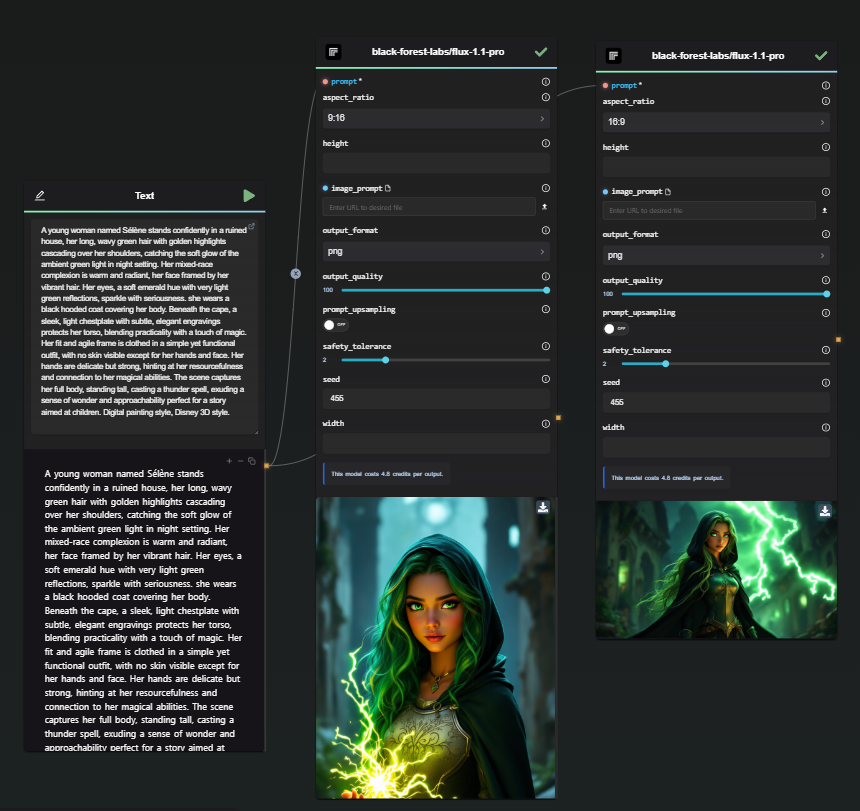
Using the same method, generate a close-up portrait of the character:

Portrait Generation

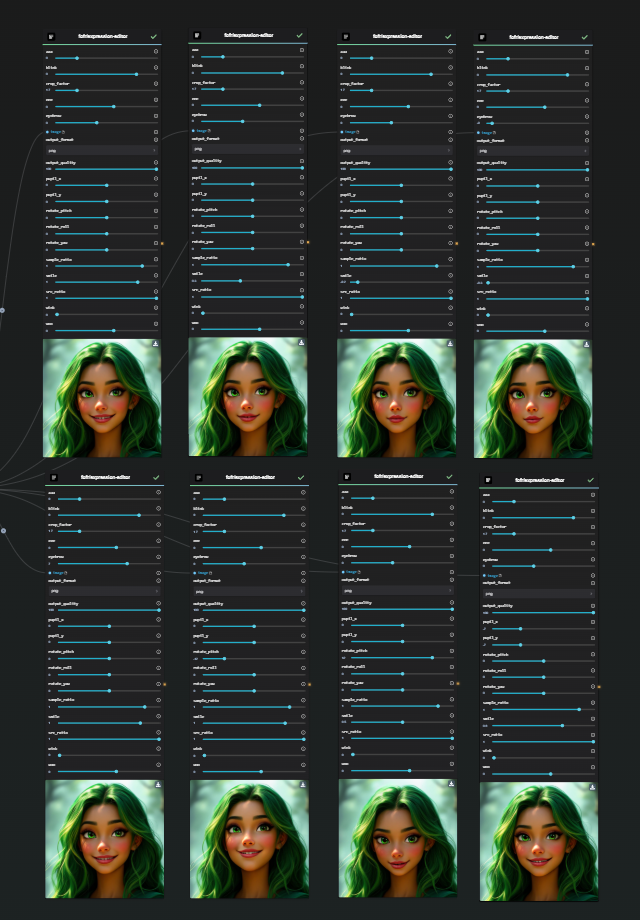
Next, use models like fofr/consistent-character with the Replicate Node to generate various face angles. This model helps maintain consistency in facial features across different poses.

Face Angle Generation

Although we lost some of the digital painting fantasy vibe, the model ensures facial consistency, which can be invaluable for face-swapping in illustrations. We can maybe find a way to reintroduce it later.

Conclusion and Next Steps

This guide provides a starting point for achieving consistency in AI-generated characters. By refining prompts and creating consistent face templates, you can produce more cohesive and believable character images.

Stay tuned for Part 2, where we’ll explore additional methods to refine and complete your character generation process.

Start experimenting with these methods today using AI-FLOW.


By incorporating these strategies, you’ll be on your way to mastering consistent character generation in AI. For more in-depth techniques and examples, be sure to follow our blog and check out the next part of this series.