ComfyUI is a serious tool. The node-based canvas, the custom node ecosystem, the degree of control over the diffusion process — it's why it became the standard for local Stable Diffusion workflows. If you have the hardware and want to run models locally, it's hard to argue against it.
The problem is the "if you have the hardware" part. And even with capable hardware, the setup itself is its own project.
The actual friction with ComfyUI
These aren't complaints — they're documented realities the community openly discusses:
GPU requirements. Most workflows expect at least 8GB VRAM. SDXL models push that to 12GB for comfortable use. Running video models or multi-step pipelines needs more. On a machine without a capable Nvidia GPU, performance ranges from slow to unusable.
Python environment. ComfyUI runs on Python and requires specific versions of PyTorch, which requires specific CUDA versions, which depends on your GPU driver. On Windows this usually works if you follow the installation guide exactly. On Linux the steps change depending on your distribution. On Mac (Apple Silicon) you're on a separate path — different instructions, and not everything runs.
Dependency conflicts. Custom nodes are where it gets messy. Each one brings its own requirements. Even with ComfyUI-Manager, version conflicts happen. A node that worked last week can break after a ComfyUI update because something in its dependency tree shifted.
Accessibility. A running ComfyUI instance lives on one machine. Getting to it from another device requires a reverse proxy or tunneling setup. It's not something you pull up on a work laptop or hand off to a collaborator easily.
None of this makes ComfyUI bad. These are the trade-offs of running powerful local models on your own hardware. But if the setup is the wall between you and actually using the tool, that's worth solving differently.
What AI-Flow is, specifically
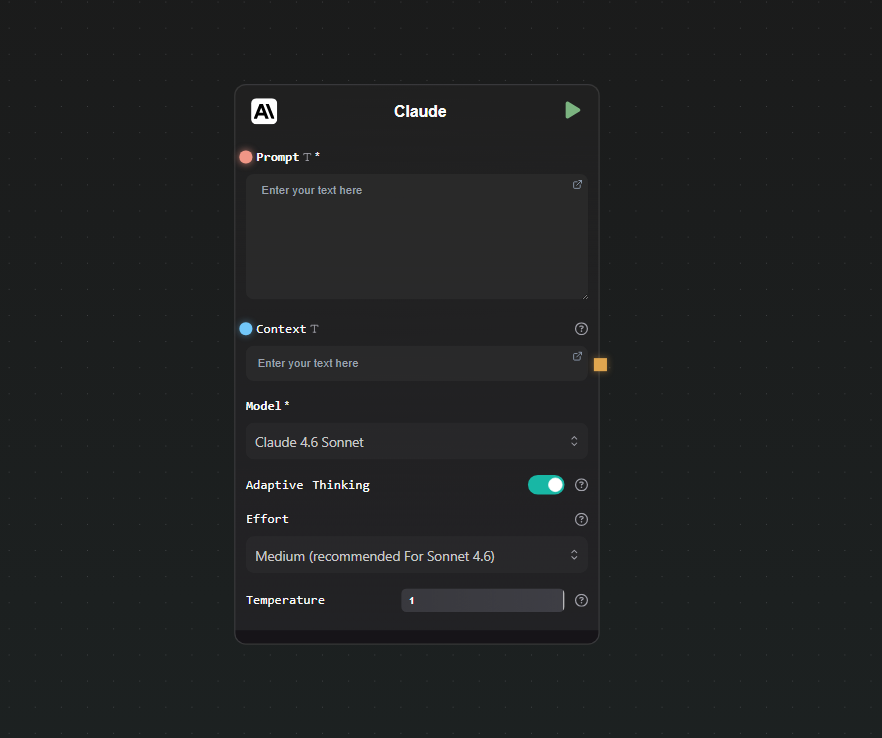
AI-Flow is a browser-based node canvas for building AI pipelines. Same mental model — nodes, connections, data flowing from one step to the next — but instead of running local models, it routes API calls to cloud providers: Replicate, Anthropic, OpenAI, Google.
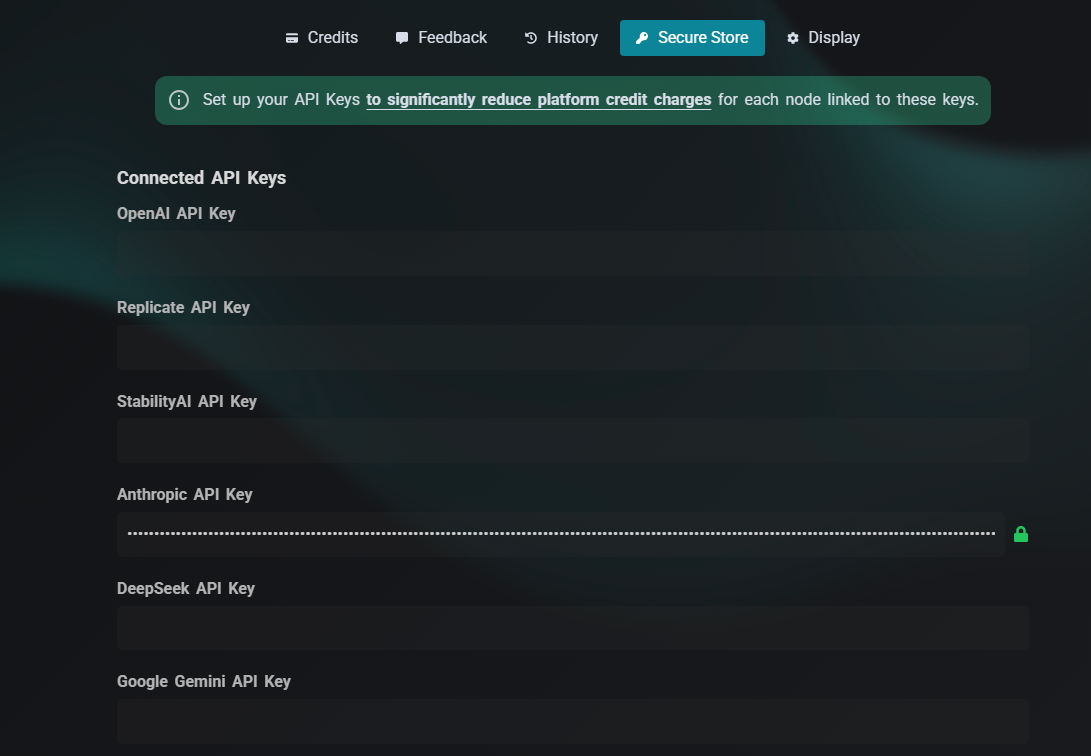
You bring your own API keys (BYOK). Set them once in the key store and every node in every workflow draws from them automatically. No markup on provider costs — you pay Replicate or Anthropic directly at their rates.
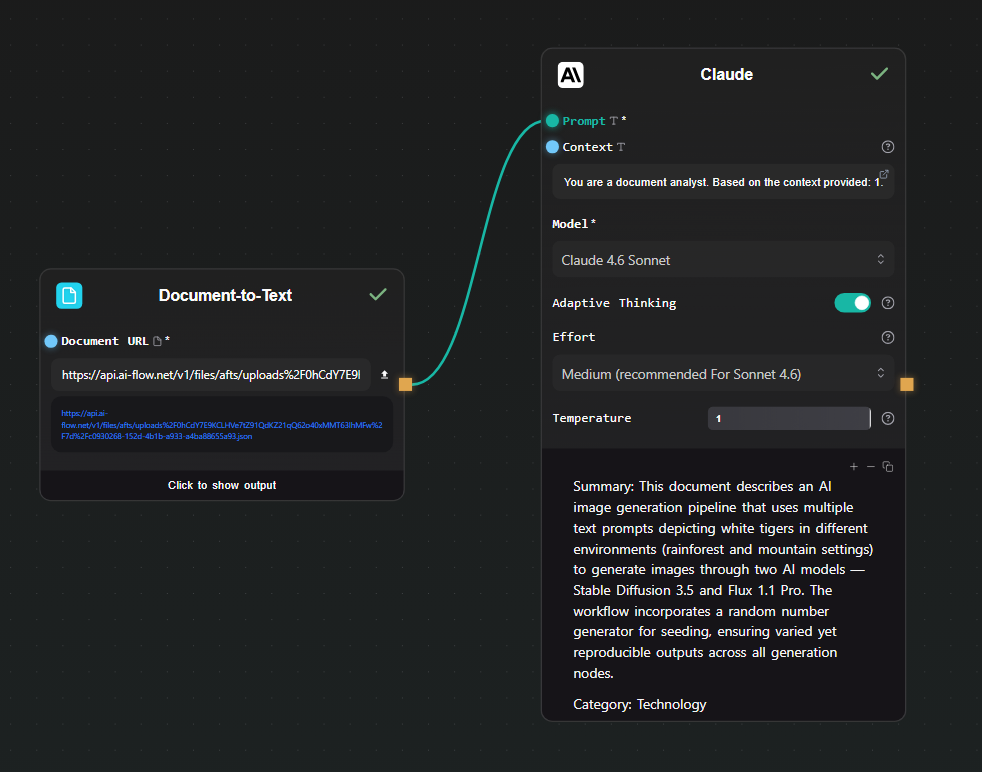
The node logic will feel immediately familiar if you've spent time in ComfyUI. Text input → processing node → output. Conditional routing. Parallel branches. Chaining one model's output into another's input. Same compositional thinking, different execution environment.
What's different: no install. No GPU. No Python. Open a browser and build.
What you give up
This is worth being direct about. AI-Flow is not a drop-in replacement if you're invested in the local model ecosystem.
No local models or custom checkpoints. Fine-tuned models, LoRAs, local .safetensors files — these are specific to local inference. API providers offer their own model catalog, but you can't upload arbitrary checkpoints.
No direct ControlNet equivalent. ComfyUI's ControlNet with local weights gives precise structural control. API image models have some comparable capabilities — depth guidance, style reference — but the control surface is different, and coverage varies by provider.
No custom node ecosystem. ComfyUI's community has thousands of contributed nodes. AI-Flow has a focused built-in set. If you need something that doesn't exist in the catalog, you're working around it.
Per-run API costs. Every generation costs something. You're also dependent on provider uptime — if Replicate has an issue, your pipeline waits. Local models don't have that dependency.
Less low-level control over diffusion. Specific samplers, exact CFG scale, step-level control — some of this is exposed via API, some isn't. The API layer abstracts parts of the process that ComfyUI exposes directly.
A workflow you'll recognize
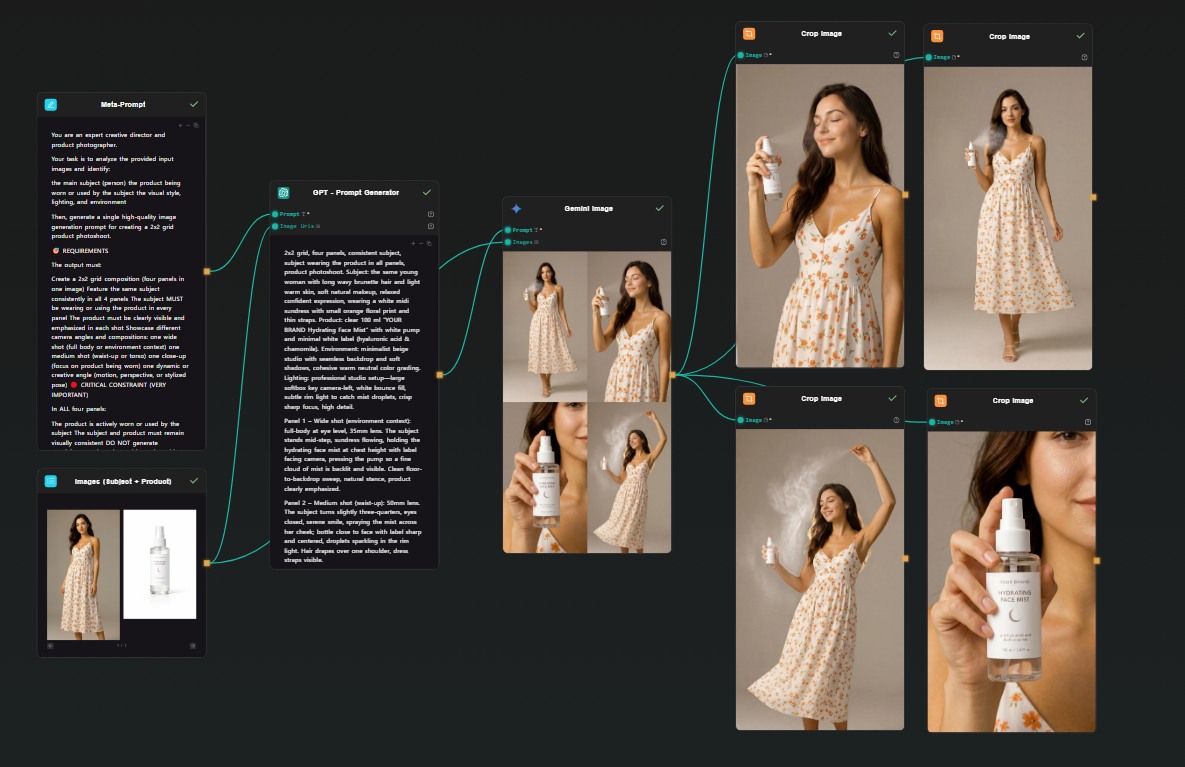
Here's a concrete pipeline that maps cleanly to what you'd build in ComfyUI: two image inputs (subject + product) → prompt expansion via GPT → image generation via Google Nano Banana 2 → four cropped outputs. One shot, four consistent photos.
The use case is product photoshoot generation — you have a person and a product, you want four photoshoot-style images of that person holding, using, or interacting with it.
Step 1 — Two Image Input nodes
Drop two Image Input nodes on the canvas. Upload your subject photo (the person) to one, your product photo to the other. Both will feed into the next step together.
Step 2 — Meta Prompt node (instructions)
Add a Text node. This is your meta prompt — the instructions that tell the downstream GPT node what kind of photoshoot to generate. Something like:
You are an expert creative director and product photographer.
Your task is to analyze the provided input images and generate
a detailed, photorealistic image generation prompt for a 2x2 grid
photoshoot showing the subject using or holding the product in
different poses — close-up, full body, lifestyle, detail shot.
Describe lighting, composition, mood, and scene for each panel.
Output only the prompt.
Step 3 — GPT node (prompt expansion)
Add a GPT node. Connect both Image Input outputs and the Meta Prompt into it. GPT receives the two reference images plus your instructions and produces a single detailed prompt describing a 2x2 photoshoot grid — four distinct scenes, consistent subject and product across all panels, with specific lighting and composition direction for each.

Step 4 — Google Nano Banana 2 node (grid generation)
Add a Gemini Image node (Google Nano Banana 2). Connect the GPT prompt output to the prompt field, and connect both original images as reference inputs. Run.
Nano Banana 2 handles multi-image reference natively — it understands both the subject and the product from your input images and applies them consistently across the generated output. It produces a single high-resolution image structured as a 2x2 grid: four photoshoot scenes, one generation. The subject looks the same across all four panels because the model is working from your actual reference photo, not synthesizing a character from a text description.
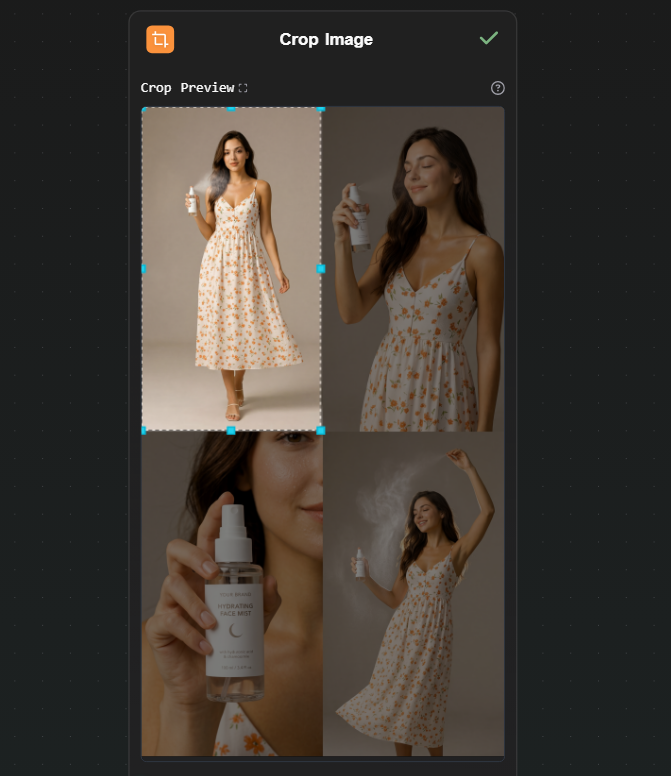
Step 5 — Four Crop Image nodes (extract each panel)
Add four Crop Image nodes. Connect the Nano Banana 2 output to each. Configure each one to extract a different quadrant: top-left, top-right, bottom-left, bottom-right.
Each node outputs one clean photoshoot image. From a single generation, you have four consistent, usable photos.
Optionally, connect each cropped output to an upscaler node on Replicate if you need higher resolution for each individual image.
Why this works better than generating four separate images
Here, Nano Banana 2 achieves the same thing because all four panels come from a single generation with the reference image in context. The subject's face, the product's packaging, the visual style — consistent by construction, not by iteration.
The cost math
A ComfyUI user running local models pays upfront for hardware and ongoing electricity, but zero per run. That math works well at high volume once the hardware is paid for.
An API-based workflow pays per run, no hardware cost. Using your own API keys:
- Google Nano Banana 2 (via Gemini API): ~$0.15 per generation
- Upscaling (via Replicate): ~$0.002–0.01 depending on the model
The photoshoot workflow above generates four consistent images in a single run. At ~$0.15 for the generation step, that's four usable photos for a few cents — no GPU purchase, no electricity, no environment to maintain.
For moderate usage — iterating on a project, running a few dozen generations a day — the cost is low. For bulk production workloads, local hardware eventually wins on per-run economics, but that crossover requires both the hardware already purchased and consistently high volume.
When to use which tool
Use ComfyUI if:
- You have a capable GPU and want to run models locally
- You need specific LoRAs, custom checkpoints, or fine-tuned models
- You want precise ControlNet control or deep access to the diffusion process
- You're generating at high enough volume that per-run cost matters more than hardware cost
Use AI-Flow if:
- You want node-based pipeline thinking without local setup
- You're working with API-based models — Replicate's catalog (1000+ models), Anthropic, OpenAI, Google
- You need to access the workflow from multiple machines or share it with collaborators
- You don't have a capable GPU and don't want to buy one for this use case
If your situation fits the second list, the templates library has pre-built image and multi-model pipelines to start from. Add your API keys in the key store, open a template, run it. The free tier works with your own keys — no platform credit needed to see how it behaves.